by Santosh | Jun 24, 2020 | Soccer, Sports
LEARNING OUTCOME
To improve attacking heading techniques
TEACHING CUES
- Timing of the header
- Direction of the header
- Communication between the players
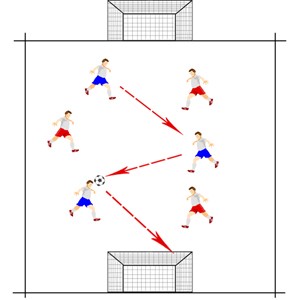
ACTIVITY SET-UP AND PROCEDURE
EQUIPMENT:
Marked area appropriate size for age, balls and cones
SET-UP:
ACTIVITY PROCEDURES:
- Players set up as shown in the diagram. 3 v 3, small goals, no goalkeepers.
- Small sided possession game.
- Normal rules apply but players can only score with a header.
To allow for success an area can be marked near each goal where defenders can not go in to so the forward has a free header.
Progressions:
- Use bigger goals to guarantee success
- Add goalkeepers
COOL DOWN/ CLOSURE
Review Skill/Activity, stretching, and questions.
by Neetu | Jun 24, 2020 | Sports
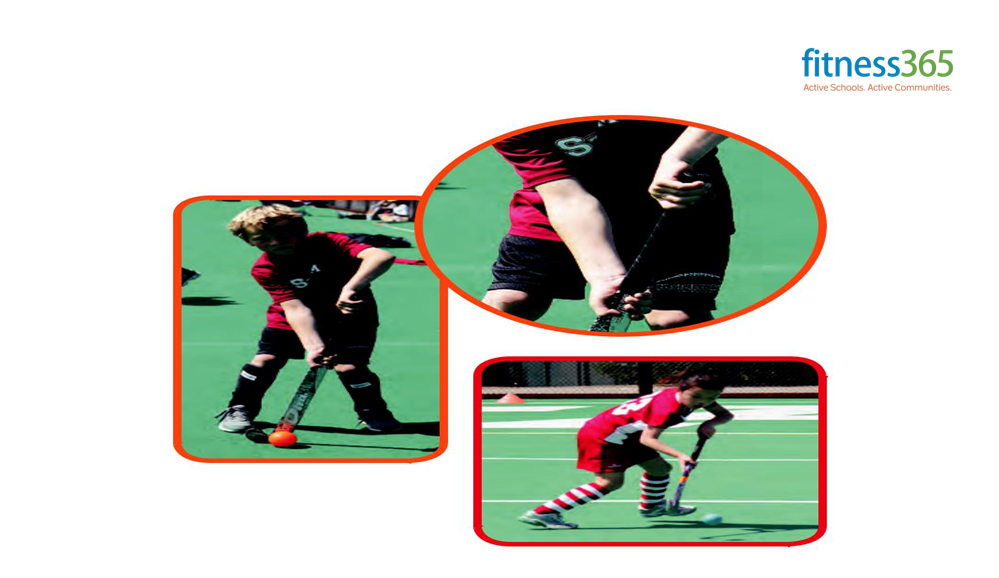
Forehand Receiving
Receiving Hand Position
- Dribbling grip with a vertical stick and left hand away from the body
- Handshake grip with hands split – right hand can be more than halfway down the stick, but not too low
- The left elbow should be as high as your shoulder in front of your body
- Your thumb is pointed down towards the ground, and
Body Position
Athletic Stance
Line up the right of center, in line with the incoming ball
Skill Execution
- Form a triangle between feet and stick head, flex the knees and create a ‘pocket’ into which the ball will be collected
- Your left foot slightly forward of your right. Angle stick forward (the left hand should be further away from your body than the stick head)
- Pick up the line of the ball
- “Soft Hands” as ball contacts stick
TRAPPING DRILLS
Pairs Trap:
Players in pairs approximately 5m apart Player 1 push passes to Player 2 P2 traps on their forestick P2 push passes back to P1
Variations: Reverse stick trap
Trapping on the move (mobile)
Receive the ball (mobile) – dribble – push pass back

by Neetu | Jun 23, 2020 | Fitness Activity
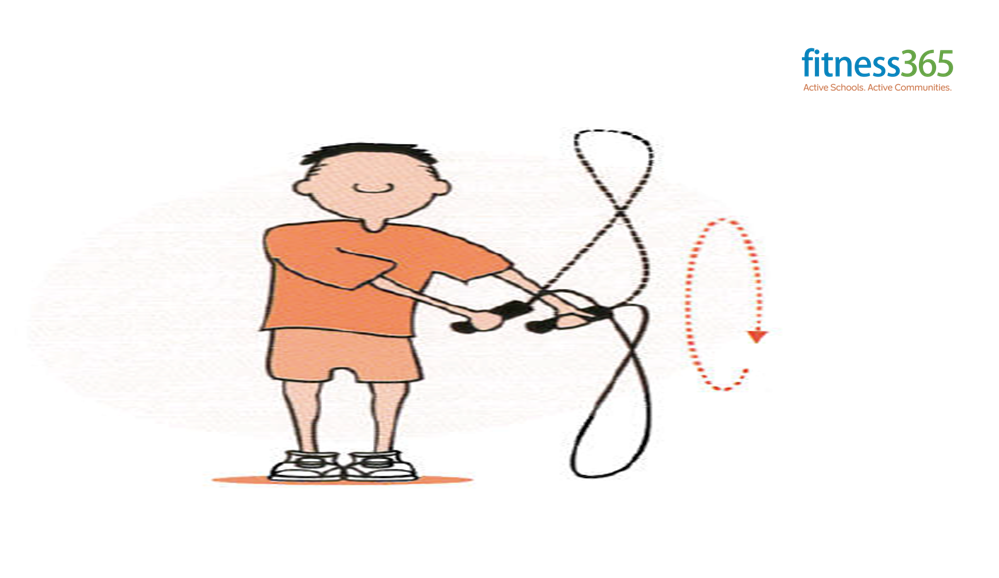
- Hold the ends of the Skipping Rope in each hand.
- Step in the middle of the rope with both feet.
- Bring the ends of the rope straight up by your side.
- See if it’s the right length. The ends of the rope should come near your armpits.
KEY TEACHING POINTS
Elbows In
Wrist Circles
Two Feet Together
Jump to a Rhythm
https://www.youtube.com/watch?v=quoyW7FZqdI
by Neetu | Jun 23, 2020 | Fitness Activity
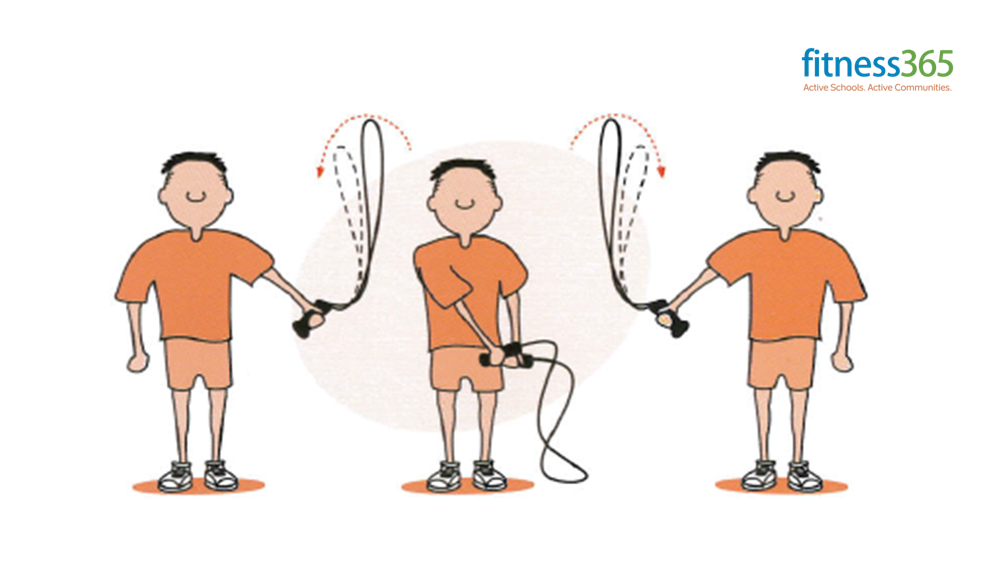
Side Swing
Equipment Required
Basic Short Skipping Rope – One per person
Activity Description
- Swing the rope to one side in a big circle
- Keep hands close together
- Make sure you are in your personal space
Progression
EASY: Hold both handles in one hand
HARD: Try an alternate side swing (swing the rope to one side in a big circle, hands will be moving in a figure of eight, repeat on the other side)
CHALLENGE: Can you swing the rope at the side and march on the spot at the same time?
by Neetu | Jun 23, 2020 | Fitness Activity
Skill: Basic
Equipment Required:
Basic Short Skipping Rope – One per person
Activity Description
Pass the rope around the body from one hand to the other
Progression
EASY: Swing the rope at the side of the body
HARD: Try leg passes (swing the rope at one side, pass the rope under the legs, swing the rope at the other side)
CHALLENGE: Can you swing the rope in a figure of eight and pass it from one hand to the other?