by Neetu | Jun 19, 2020 | Fitness Activity
Posture: Shava-asana: The Corpse Pose (Pronunciation: sha-vah-sa-na)
Description:
The Sanskrit word shava means corpse hence this is the Corpse. The shava-asana is also known as the mrta-asana.
Performance Instructions
- Lie flat on your back with your legs together but not touching, and your arms close to the body with the palms facing up.
- Keep your eyes gently closed with the facial muscles relaxed and breath deeply and slowly through the nostrils.
- Starting at the top of the head and working your way down to the feet, bring your attention to each part of your body, consciously relaxing it before proceeding on to the next.
- Remain in the shava-asana for between 3 and 5 minutes or longer. If you become sleepy while in the shava-asana begin to breath a bit faster and deeper.
Comments:
While many consider this a simple posture at first, its simplicity eventually proves to be deceiving. The goal of the shava-asana is for the body and mind to be perfectly still and relaxed. Not only should the body be motionless and at ease, but the mind as well should be quiet, like the surface of a still lake. The result will be a deep and stable relaxation that will extend into your meditation or be felt through the activities of your daily circumstances.
It goes without saying that the shava-asana will take some time to perfect. You will find the simple exercise of focusing your attention on each part of your body and consciously directing the breath there to be a great help with this posture.
There are two common obstacles that can prevent you from fully benefitting from this posture: sleepiness and a restless mind. If find yourself getting drowsey while in the shava-asana increase the rate and depth of your breathing. If your mind is restless or wondering focus your attention on all of the bodily senations you’re experiencing. Bring your mind to the sensation of the floor beneath you or on the rhythm of your breath.
While practing your Yoga-asana routine you should always begin and end each session with the shava-asana.
Duration/Repetitions
We recommend that you begin your period of yoga-asana practice with at least 3-5 minutes of shava-asana. Return to it periodically throught your posture session to relax and rejuvinate the body/mind and then conclude your session with at least 3-5 minutes more
by Neetu | Jun 19, 2020 | Fitness Activity
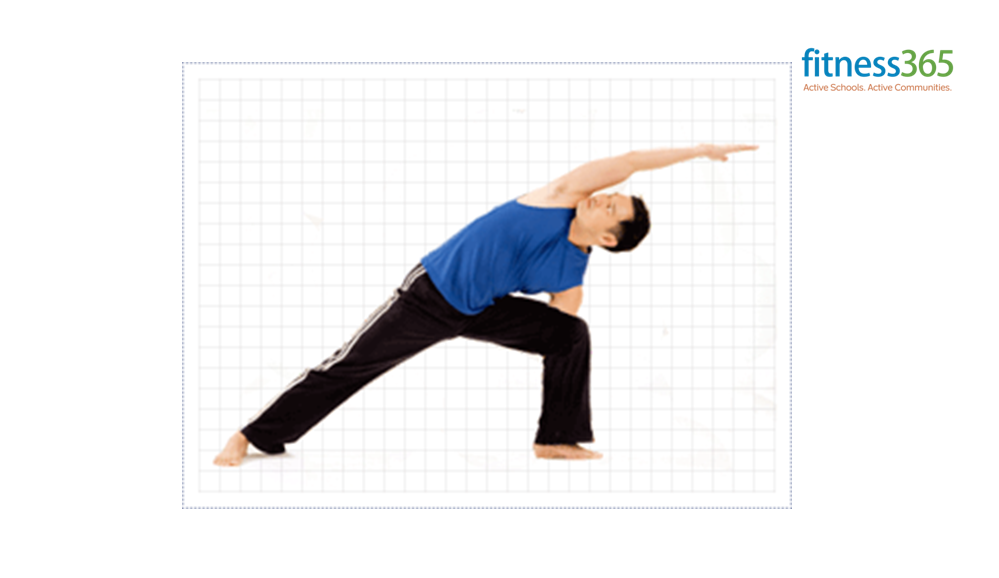
Posture: Parivritta-parshvakona-asana: The Turned Side-Angle Pose
(Pronunciation: par-ee-vrit-ah parsh-va-cone-ah-sa-na)
Description:
The Sanskrit word parivritta means revolved, turned round or back, Parva means side and Kona means angle.
Performing Instructions
- Stand with the feet together and the arms by your sides (see the tad-asana).
- Inhale and spread your legs apart slightly further than shoulder distance (about 3-4 feet).
- Stretch your arms straight out from the shoulders parallel to the floor with your palms facing down.
- Exhale slowly and turn your right foot toward the right 90 degrees. Bend your right knee about 90 degrees.
- Place the palm of your left-hand flat on the floor next to the outside of your right foot. Rest the right elbow on the outside of the right knee.
- Stretch the right arm over your head, parallel with the floor, with the inside of the elbow resting on the ear. Hold for abot 30-60 seconds while breathing gently through the nostrils.
- Slowly return to a standing position and repeat on the other side reversing directions 2-6.
Comments
The parivritta-parshvakona-asana stretches the muscle group along the side of the torso. It strengthens the ankles, calves, and thighs as well as the arms. It is also an excellent posture to tone the muscles in the waist and hips. This posture also strengthens the digestive system and thus aids digestion, stimulates blood circulation, and assists in restoring strength and flexibility to the spine.
Duration/Repetitions
Hold the posture for as long as is comfortable. Performing the parivritta-purvashakona-asana once on each side is considered one repetition. Do 2 or 3 repetitions.
by Neetu | Jun 19, 2020 | Fitness Activity
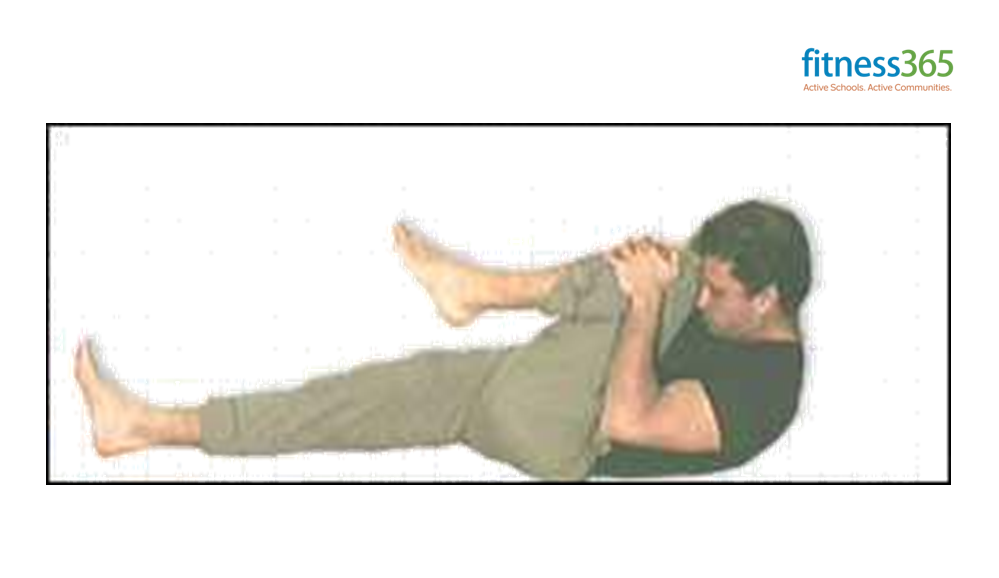
Posture: Pavana-Mukta-asana: The Wind-releasing Pose
(Pronunciation: pa-vana mook-tah-sa-na)
Description:
The Sanskrit word Pavana means air or wind and Mukta means freedom or release, therefore this is the “wind relieving posture” so named because it assists in releasing trapped digestive gas from the stomach and intestines.
Performing Instructions
- Inhale and bend the right knee and pull it close to the torso with both hands while interlocking the fingers just below the knee. Keep the left leg flat on the floor.
- Hold the inhaled breath for a few seconds then exhale slowly through the nostrils and lift the back, shoulders and head off the floor and touch the knee with the forehead.
- Hold the exhaled breath for a few seconds then slowly inhale and return the back, shoulders, and head to the floor. Remain to hold the knee.
- Hold the inhaled breath for a few seconds then exhale while bringing the right leg to the floor.
- Lie flat on the back in the shava-asana for a few seconds then repeat beginning with the left leg.
Comments
As mentioned above, practicing the Purana-Mukta-asana will help to release gastrointestinal gas. It also improves other gastrointestinal problems like upset stomachs and constipation by stimulating the abdominal region.
Duration/Repetitions
Hold each of the four parts of this posture (corresponding with the held breaths) for three to five seconds each. Repeat the purchase-Mukta-asana three to five times on each side.
by Neetu | Jun 19, 2020 | Fitness Activity
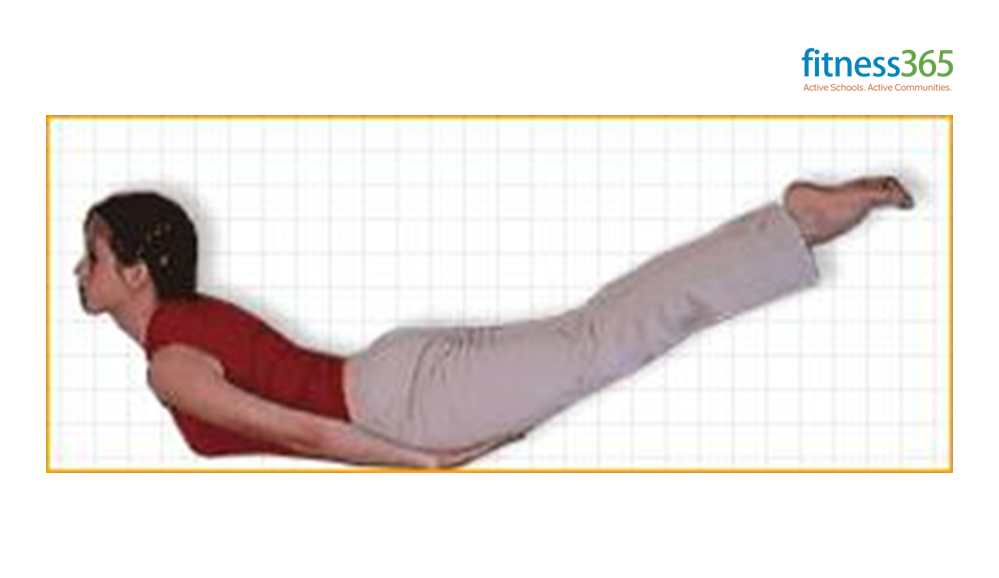
Posture: Shalabha-asana (The Locust or Grasshopper Posture)
Description:
The Sanskrit word Shalabha means locust or grasshopper. There is a variation of this posture called the viparita-shalabha-asana. The Sanskrit word viparita means “reverse.” This is an advanced variation not covered here.
Performing Instructions
- Lie on the stomach with the head turned to one side and the arms alongside the body with palms facing upward.
- Turn the head and place your chin on the floor. Slide your hands under your thighs, with the palms pressed gently against the top of your thighs.
- Inhale slowly and then raise the head, chest, and legs off the floor as high as possible. Tilt your head as far back as possible. Keep your feet, knees, and thighs pressed together.
- Starting at the top of the head and working your way down to the feet, bring your attention to each part of your body, consciously relaxing it before proceeding on to the next.
- Remain in the posture while holding the breath. You can support your legs by pressing the hands upward against your thighs.
- Hold the posture for as long as you can hold the inhaled breath then slowly return the legs, chest, and head to the floor while exhaling.
- Remove your hands from under your thighs and place the arms alongside your body. Turn your head to the side and rest.
Comments:
The shalabha-asana has many benefits. Besides strengthening the muscles of the upper legs and lower back, it stimulates the stomach and intestines helping to relieve gastrointestinal gas, strengthens the bladder, and stretches the spine.
To assist raising the legs as high as possible keep the back of the hands resting against the floor while pushing the legs upward with the fingers. As you get better at this posture and increase the strength of your legs you can raise the hands completely off the floor so your legs are raised unsupported. This increases the benefits of the shalabha-asana.
Duration/Repetitions:
Hold this posture for as long as you can hold the inhaled breath. Repeat the shalabha-asana three times.
by Neetu | Jun 19, 2020 | Fitness Activity
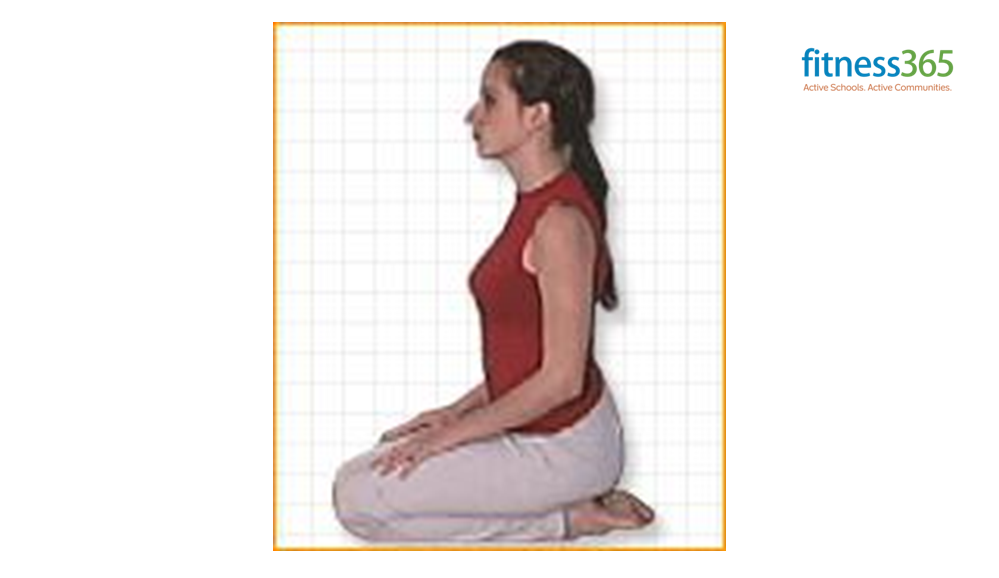
Posture: Siddha-asana (The Accomplished or Adept Pose)
(Pronunciation: sid-dhah-sa-na)
Description:
The Sanskrit word Siddha means accomplished or adept, one who has attained the highest. The name implies the attainment of a perfectly stilled mind and the experience of peace that results from meditation. The Siddha-asana is a recommended pose for meditation.
Performing Instructions:
- Begin in a seated posture. Bend the left knee and grasp the left foot with both hands and place the heel against the perineum and the sole of the foot against the inside of the right thigh.
- Exhale and reach down and loop the forefinger of the right hand around the big toe of the right foot and grasp the left foot with the left hand.
- Bend the right knee, grasp the right foot with both hands and place the outside edge of the right foot where the calf and thigh of the left leg meet, right ankle over left ankle. The heel of the right foot should line up approximately with the navel and be as close to the pubic area as possible..
- With palms up, place the hands on the knees, form a circle with the thumb and forefinger and extend the remaining fingers straight ahead.
Comments:
The siddha-asana is complicated to describe but is actually one of the simpler sitting postures. It requires less flexibility of the legs than the padma-asana yet it facilitates relaxation, concentration and ultimately, meditation.
Siddha-asana helps to establish an equilibrium throughout the body/mind. It will also help stretch the legs and pelvic area to the point where the padma-asana can be held effortlessly. Either posture, by creating a firm foundation with the legs locked in a crossed position and the spine held straight and motionless, awakens the attention and helps cultivate concentration. When concentration is highly focused and undistracted, meditation follows.
Duration/Repetitions:
Sit in the siddha-asana for a minimum of 1 minute and extended the time up to ten minutes or more.