by Neetu | Jun 24, 2020 | Sports
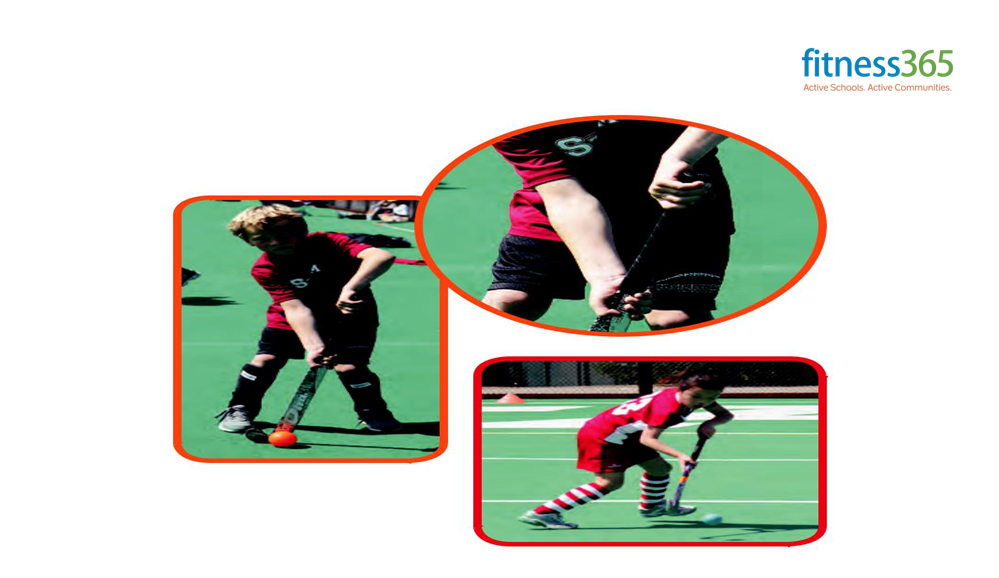
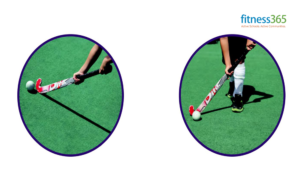
Forehand Receiving
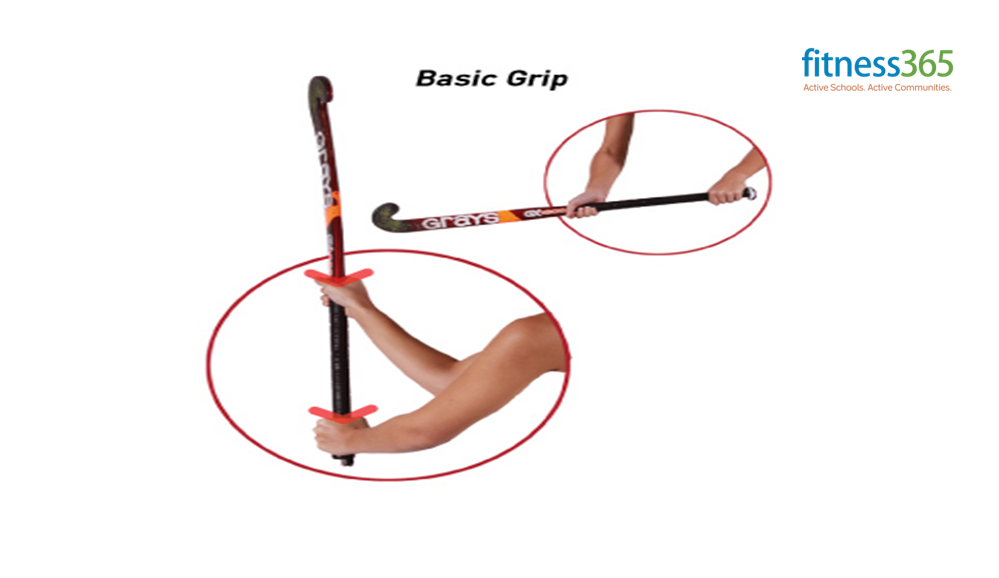
Receiving Hand Position
- Dribbling grip with a vertical stick and left hand away from the body
- Handshake grip with hands split – right hand can be more than halfway down the stick, but not too low
- The left elbow should be as high as your shoulder in front of your body
- Your thumb is pointed down towards the ground, and
Body Position
Athletic Stance
Line up the right of center, in line with the incoming ball
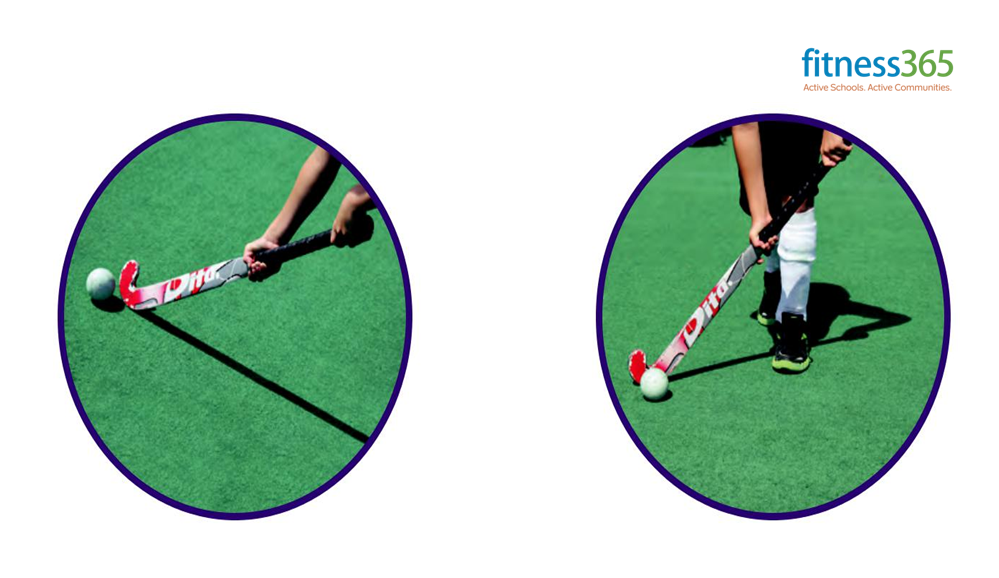
Skill Execution
- Form a triangle between feet and stick head, flex the knees and create a ‘pocket’ into which the ball will be collected
- Your left foot slightly forward of your right. Angle stick forward (the left hand should be further away from your body than the stick head)
- Pick up the line of the ball
- “Soft Hands” as ball contacts stick
TRAPPING DRILLS
Pairs Trap:
Players in pairs approximately 5m apart Player 1 push passes to Player 2 P2 traps on their forestick P2 push passes back to P1
Variations: Reverse stick trap
Trapping on the move (mobile)
Receive the ball (mobile) – dribble – push pass back
by Neetu | Jun 15, 2020 | Sports
Aim
Holding the Hockey Stick with comfort and confidence.
Equipment Required
1 Hockey Stick, 1 ball, 1 saucer cone per student
Play Area Set-Up
- Create boundaries for a large activity area with large cones.
- Scatter saucer cones throughout the area to create a home base for each student.
Activity Description
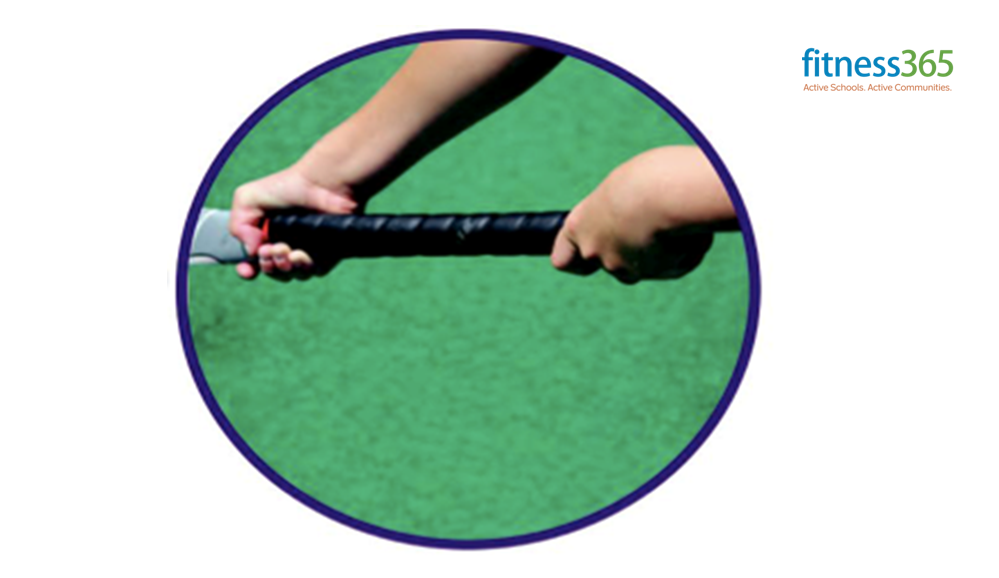
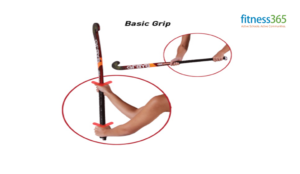
Hockey Grip
- The firm left-hand grip at the top of the stick
- Turn Stick like opening a door
- Right hand well down the stick
- Forefinger and thumb form a “V”
- Relaxed right-hand acts as a guide
- Used to dribble, trap the ball, and push passing
Step by Step Activity Description
- Demonstrate how the hockey stick has two sides – “Round side” & “Flat side”
- Place stick on the ground – top of the handle in line with your left foot – round side facing up
- Raise your left hand and show your left thumb and index finger pointing to the sky – we call this a “V”
- Position this grip near the top of the handle with the thumb pointing towards the ground and index finger towards the front – wrap thumb and fingers around the stick with your little finger near the top of the handle
- Bend at the knees and lift the hockey stick with the left hand – hold the stick in front of you
- Demonstrate how to use the left hand to turn the stick – Hook points towards the sky – Hook points to the ground – Turn the hook and move the ball from side to side – turn your left wrists thus allowing the flat side of the hook to roll over the ball
- The positioning of the right hand – place right hand under the stick at the end of the handle grip – holding the stick loosely
- Demonstrate holding the stick in the air – turn the toe of the stick towards the sky and ground with right hand on the stick
- The stick will be able to slip through move up and down in the loose right hand like a tunnel
- This demonstration shows how the left wrist turns the stick with the right hand having a soft grip
Athletic Stance
- Wide Base – Feet shoulder-width apart
- Knees slightly bent, slight squat
- Elbows comfortably away from your body
- Head on a ‘swivel’, not looking down!
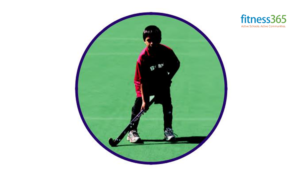
Step by Step Activity Description
- The stance – bend at the knees (not the back) with left foot forward and stick on the ground
- If players rotate their right wrist towards their left side, then that player is holding the stick too tight with the right hand
- Players stand with left foot forward knees bent – coach walks around and looks at each player’s grip and stance

by Neetu | Jun 10, 2020 | Sports
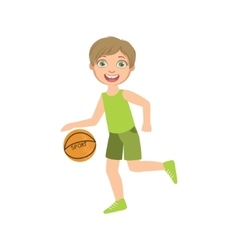
Aim
Continuously dribble basketball through different challenges
Equipment Required
4 large cones, 1 basketball per student, 1 bean bag per student, 1 sport marker per student
Play Area Set-Up
- Create boundaries for a large activity area with cones.
- Scatter spot markers throughout the area.
- Each student to a spot marker with a ball and a bean bag.
Activity Description
- Are you up for a Balance Ball challenge? We’re going to practice dribbling with one hand while we balance a bean bag on top of the other hand.
- Put the bean bag on your hand. When I say, “GO!” begin dribbling and continue until you hear the stop signal.
KEY TEACHING POINTS – Body is Steady, Dribble with a Push from Arm and Fingers
Grade Level Progression
- Scaffold this activity by introducing the bean bag task without any attempt at dribbling. Prompt students to move in different ways while balancing the bean bag. With advanced K students, you may be able to introduce a dribble.
- Prompt students to dribble continuously in self-space while balancing the bean bag.
- Prompt students to alternate dominant/non-dominant hands. Challenge students to dribble continuously while walking in general space.
Challenges & Modifications
- Change the body part used to balance the bean bag and/or experiment with multiple bean bags.
- Allow students to simply hold on to a beanbag in one hand while dribbling with the other
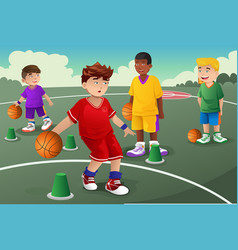
by Neetu | Jun 10, 2020 | Sports
Aim
Understand differences between self-space and general space while moving safely through general space
Equipment Required
4 large cones, 1 basketball per student, 1 bean bag per student
Play Area Set-Up
- Create boundaries for a large activity area with cones.
- Scatter bean bags throughout the activity area.
- Balance a basketball on top of each bean bag.
- Each student standing next to a bean bag and ball.
Activity Description
- It’s time to play 7 Dribbles. Each basketball is perfectly balanced on a bean bag. When I say, “GO!” pick up the ball next to you and dribble it 7 times.
- After 7 dribbles, balance the ball back on the bean bag and then move to a new ball to make 7 more dribbles. Continue until you hear the stop signal
KEY TEACHING POINTS – Dribble with Finger Pads, Waist High, Eyes Alert, Make Quick Looks
Grade Level Progression
- Dribbles do not have to be consecutive. Students can bounce and catch if dribbling is too difficult.
- Dribbles consecutively with the dominant hand.
- Alternate dominant and non-dominant hands with each new basketball
Challenges & Modifications
- Add 7 jumping jacks (or other exercises) after each set of dribbles.
- Decrease the number of dribbles/bounces to 1-6.
by Neetu | Jun 10, 2020 | Sports
Aim
Every student should make at least 2 dribbles in a row.
Equipment Required
4 large cones, 1 basketball per student
Play Area Set-Up
- Create boundaries for a large activity area with cones.
- Scatter spot markers throughout the area.
- Each student to a spot marker with a ball
Activity Description
- When I say, “GO!” count how many times you can dribble the ball.
- When you make a mistake, complete 1 mini-jump for each dribble that you made (e.g., 4 dribbles in a row = 4 mini-jumps).
- Do mini-jumps by holding the ball in both hands over your head and then making quick 1-inch jumps off of 2 feet.
KEY TEACHING POINTS – Dribble with Finger Pads, Waist High
Grade Level Progression
- Students begin by counting how many times in a row they can drop and successfully catch balls.
- Students count consecutive dribbles in self-space using the dominant hand
- Students count consecutive dribbles as they walk in general space.
Challenges & Modifications
- Add a variety of exercises, working to improve each component of health-related fitness.
- Students can sit with legs spread apart and use a low-bounce foam ball.