by Neetu | Jun 11, 2020 | Sports
Aim
Develop skills the batting by hitting in specified directions & running between the wickets
Equipment Required
- 2 Saucer cone/tees
- 2 stumps
- Marker cone
- 1 bat & 2 balls per game (8 – 10 players)
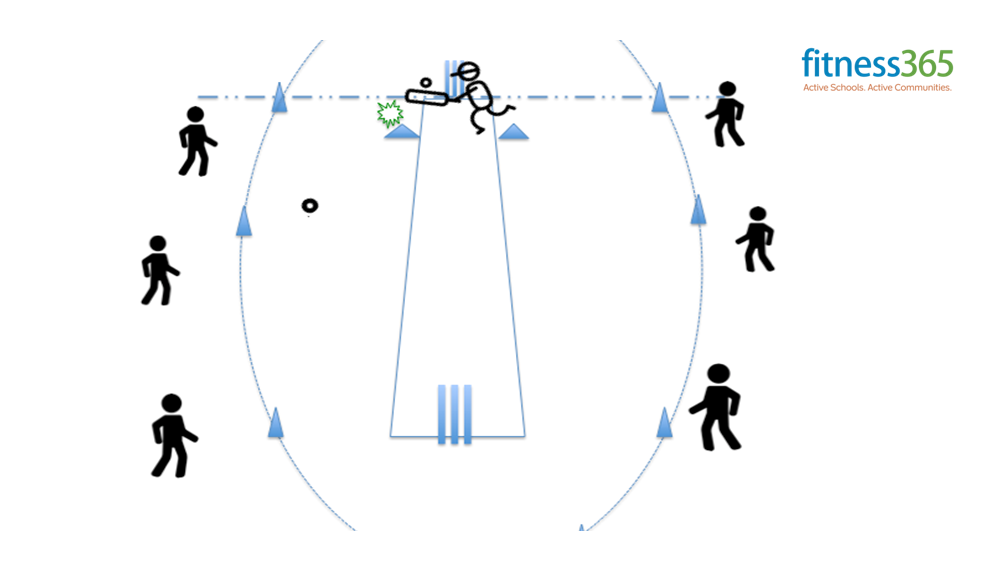
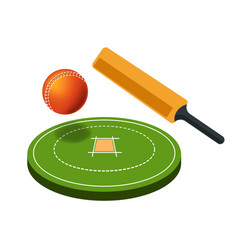
Play Area Set-Up
- Form a circle with markers around the playing pitch.
- Have two tees/saucer cone on the batting crease either side of the stumps.
Activity Description
- There is one batter at a time with the remaining players acting as fielders and evenly spread outside the circle.
- The batter hits each ball from the batting tees in any direction and attempts to complete as many runs as possible between the stumps before both balls are returned to the tees by the fielders.
- The fielding side is not able to begin chasing the balls until the second ball has been hit from the tee. After each batter has had a turn the fielders rotate.
- The batter must wait until the fielders resume their position before they can hit the ball. No fielders are allowed in the area between the batter and the tees. Move through the batting order twice to ensure each batter has 2 turns at batting.

Grade Level Progression
- Shorten or widen the play area to increase batting & fielding complexities.
- Include hitting a particular target as part of batting to get additional run
- Have a bowler to bowl to the batsman instead of using a tee
by Neetu | Jun 11, 2020 | Sports
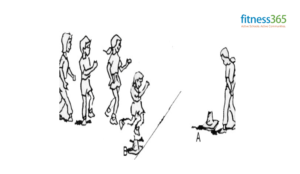
Aim
Practice the batting & Fielding techniques learned in basics
Equipment Required
- 3 saucer cone
- 2 large cones
- 2 stumps
- 1 bat & 1 ball per game (8 – 10 student group)
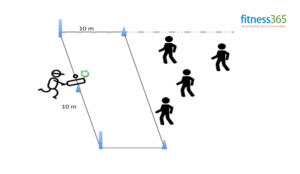
Play Area Set-Up
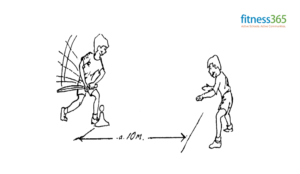
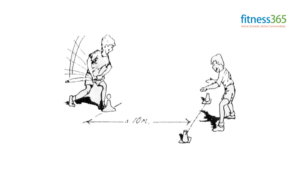
- A rectangular play zone is marked with saucer cones & stumps. One side of the zone is batters area & others placed approx. 10 m away as the fielder’s area.
- A saucer cone/tee is placed at the center of the longer edge towards the batter’s side where batsman stands and hits.
- Stumps are placed on the long edges of the rectangular play area on the batsman’s end and saucer cones/tees are placed on edges of the fielder’s end
Activity Description
- The game can be played in teams or by having a fielder replace a batter when they have completed their turn.
- The batter hits the ball from the tee between the markers. The batter then runs around either of the stumps to the left or right as many times as possible, before the fielding side can retrieve the ball and place it back on the tee.
- Each lap of stump counts as a run scored. If the batter fails to hit the ball or clear the neutral zone the player repeats that turn. Each batter has 2 hits.
- Once the ball is placed on the tee the batter must wait until the fielder resumes their position before they can hit the ball.
- No fielders are allowed in the area between the batter and the markers (neutral zone).
Grade Level Progression
- Shorten or widen the play area to increase batting & fielding complexities.
- Include hitting a particular target as part of batting to get additional run
- Have a bowler to bowl to the batsman instead of using a tee
by Neetu | Jun 11, 2020 | Sports
Aim
Get the batting & Throwing basics correct for Grip, Stance, Movement while making the shot
Equipment Required
• Bat
• Tennis Ball
• Tee per pair
Activity Description
Station 1 – Tee Drive (Pairs)
Start batter one step behind the tee and encourage the batter to step as close as possible to the tee, with eyes on the ball. Contact is the major objective. Each batter has 6 hits before swapping with a partner.
Challenge 1: Batter hits towards the partner
Challenge 2: Batter hits towards the placed targets
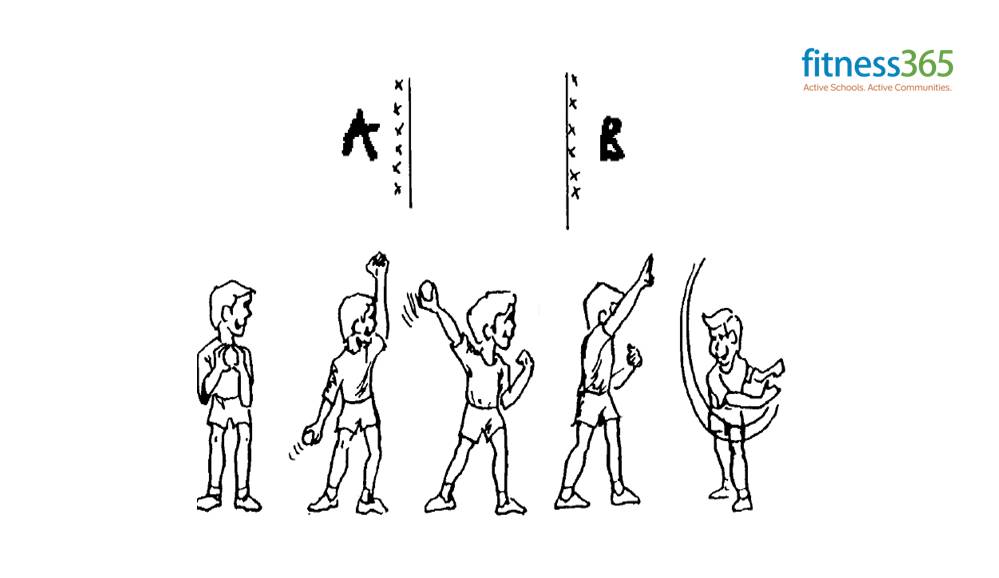
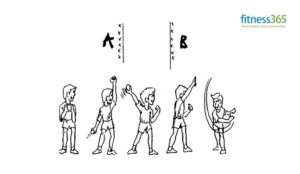
Station 2 – Pairs Bowling (stationary)
In pairs, players on line A bowl from a stationary position to their partner on line B. Then players on line B bowl back to their partner also from a stationary position.
Challenge 1: Player from Side A should bowl to the corresponding player on side B
Challenge 2: Player from Side A should bowl to the corresponding player on side B counting how many times they can hit the stump

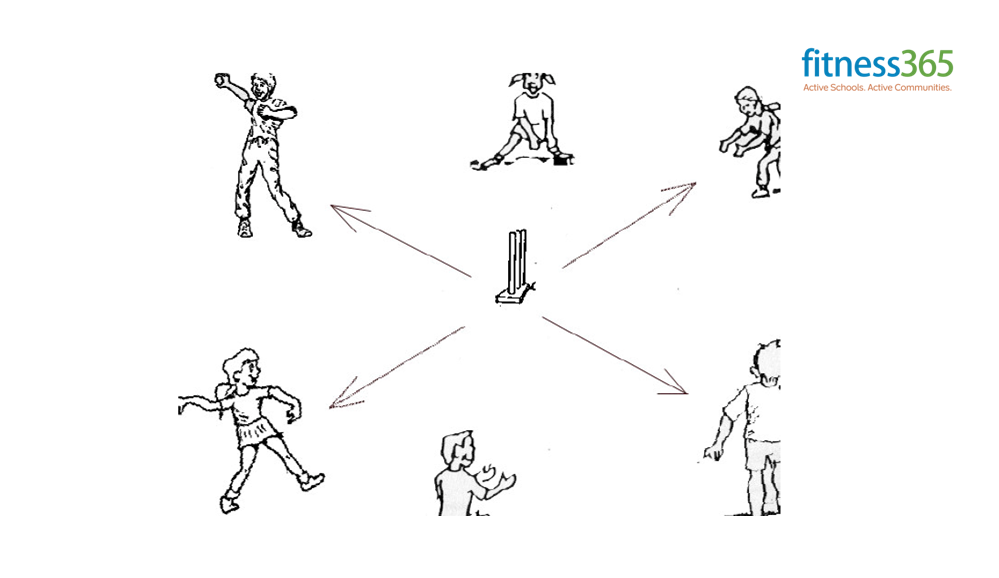
Station 3 – Underarm Target Throw
1) In pairs, players roll the ball and attempt to hit the stumps. Each time the stumps are missed the pair take 1 step forwards and each time the stumps are hit the pair take two steps backward. For advanced players alternate between left and right hands.
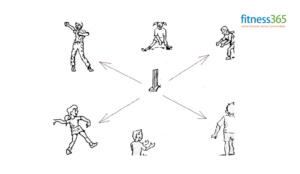
2) Have players grouped into pairs, with one ball per pair? Players form a circle with partners opposite each other and a set of stumps in the middle of the circle. Overarm throw at stumps between partners. Pair score 1 point every time they hit the stumps. The pair with the most hits wins.
Station 4 – Captain Ball Relay
Divide players into 2 – 3 groups to race against each other. The team lines up behind marker B with one player at marker
A. This player underarms the ball to the person at marker B. This player catches the ball and underarms it back, before kneeling on the ground. This continues until the last person catches the ball and they run to marker A, while the person on marker A runs to the front of the line at marker B. The first team to have all players as the leader is the winner.
by Neetu | Jun 11, 2020 | Sports
Aim
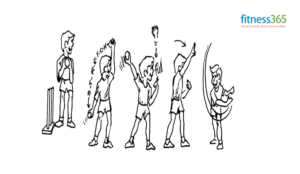
Get the bowling & catching basics correct for grip, action & cup hands
Equipment Required
• Tennis Balls
Play Area Set-Up
1. Create boundaries for a large activity area with large cones.
2. Create a Bowling area and throwing area individually while taking respective sessions
Activity Description:-
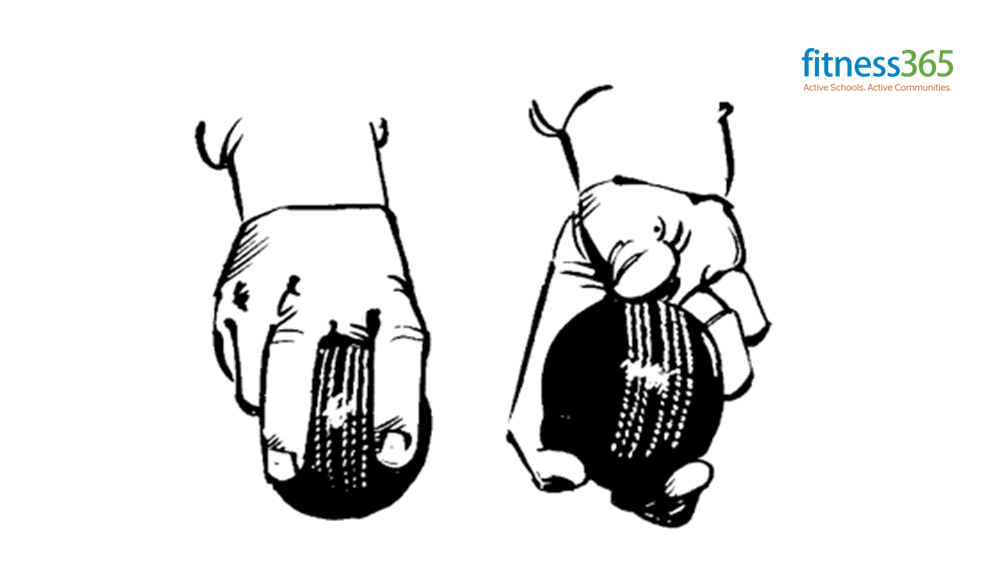
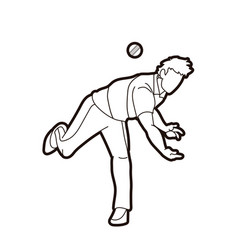
1. Bowling
Grip
- 1st and 2nd fingers are placed on the seam
- Thumb is underneath on seam
- Last two fingers are tucked into the palm

Action: 1st Method – Pull the String
- Stand side on
- Stretch the string with the front arm reaching for the sky and bowling arm next to back knee
- Pull the string with front arm and release ball
- Follow through ie bowling hand in the back pocket
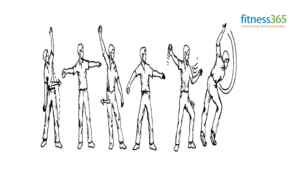
Action: 2nd Method – Pull the String
- Make a ‘cross’ with arms then turn side on with the arm holding the ball at the back
- Head level and turned to look at the batter
- Begin rocking from front foot to back foot like a see-saw
- Once you have a good rock release the ball as you rock forwards
- Front arm pulls down past left hip with bowling arm following across body
2. Catching
Close Catching
- Stand with feet shoulder-width apart and knees slightly bent
- Cup hands like getting a ‘drink from the tap’
- Have fingers pointing towards the ground
- Watch the ball into hands
- Hands and elbows give with the ball, like catching an egg
Outfield Catching
- Hands above eyes
- Fingers pointing up and back with elbows bent
- Hands and elbows give with the ball, like catching an egg
Grade Level Progression
1. Slowly increase the bowling pace. Catch the ball thrown from an increasing distance
2. Vary the speed of the ball while bowling, Catch the ball thrown with an increasing height
3. Bowl towards the target & try hitting it. Catch the ball with both height and distance variation
Hints & Tips for PE Effectiveness
- Organize children into groups
- Organize groups according to age and ability. You may need to reorganize groups after the first or second week
- Have a maximum of 10 in a group
- Give each group a memorable name (e.g the ‘Virat Kohli’s group) this will allow you to organize children quickly into groups
- The Coordinator should oversee the program and help parents run the activities rather than be tied to one group
- Ensure there is adequate room between activities for safety purposes
- Have the equipment needed for modified games ready to set-up
- Organize to have a helper look after money and registrations to allow the coordinator to look after the activities
- Try not to place too much emphasis on technique, the ability to bowl a ball or hit a ball will provide the greatest enjoyment during the early stages of the program
by Neetu | Jun 11, 2020 | Sports
Aim
Get the batting & Throwing basics correct for Grip, Stance, Movement while making the shot.
Equipment Required
• Bat (Small-Medium size)
• Smiley Balls
• Fluff Balls
• Tennis Balls
Play Area Set-Up
1. Create boundaries for a large activity area with large cones.
2. Create a batting area and throwing area individually while taking respective sessions
Activity Description (Batting)
1. Grip
- Place bat face down
- Have hands together
- Pick bat up with V’s made by the thumb and index finger pointing down back of the bat
2. Front Foot Shot
- Watch the ball
- Lift bat straight back
- Step towards the line of the ball
- Head over ball
- Use full-face of bat
3. Stance and Back lift
- Stand in a comfortable side on position
- Eyes level
- Feet shoulder-width apart
- Bat resting on back foot Shot
- Lift bat straight
- Move back and across to off stump back with the back foot
- Front foot moves back and in line with the body
KEY TEACHING POINT: Keep the hands above the ball ALWAYS
Throwing :
1. Grip
- Fingers on top of the ball
- Fingers across the seam
2. Action
- Front arm, hip, and footpoint towards the target
- Throwing an arm up at shoulder height
- Step as you throw
- Follow through as if bowling
KEY TEACHING POINT: The fingers, wrist, elbow, and shoulder should all be used
Grade Level Progression
1. Increase the speed of the ball while batting, Throwing towards a particular direction.
2. Vary the speed of the ball while batting, Throwing towards a particular direction & Target
3. Increase the distance between the batting and bowling spots. Hitting a target or throw between the target while throwing in changing directions
by Neetu | Jun 11, 2020 | Sports
Aim
- Move into open space in order to get open for a pass from my teammate.
- Discuss which game strategies worked and which did not work.
Equipment Required
1 spot marker per 3 students, 1 basketball per 6 students, Pinnies for teams, Cones to create a grid
Play Area Set-Up
- Create 1 large grid per 6 students with 1 spot marker positioned at each end of the grid to act as baskets.
- Group students into teams of 3, each team with its own color and each student with a wristband.
- Teams play Rock, Paper, Scissors to see who starts with the ball.
Activity Description
- It’s time to have some fun with our basketball skills and play 3 v 3 Bounce Ball.
- Each team will try to score a point by bouncing the ball on their team’s spot. Points are also scored by making complete passes to each member of your team in a single possession.
- Defense must play 3 full arm-lengths away from offensive players and can only intercept passes. They cannot touch offensive players. If a foul is made, the offense scores a point.
- When a team successfully bounces the ball on their spot, change possession with play going in the other direction
KEY TEACHING POINTS – Ball Fake to Freeze Defense, V-Cut to Get Open
Grade Level Progression
- Third graders may require a slower-paced game. Play 3 offense v 2 defense with one team remaining offense for 2 minutes before switching roles. How many points can each offense score in 2 minutes?
- Play the activity as it is written above.