by Santosh | Jun 16, 2020 | Soccer, Sports
LEARNING OUTCOME
To improve the passing technique
TEACHING CUES
- Accuracy of pass
- Weight of pass
- Communication
- Vision and awareness of where the pass is coming from and going to.
- The direction of 1st touch
ACTIVITY SET-UP AND PROCEDURE
EQUIPMENT:
1 ball between 4 players
SET-UP:
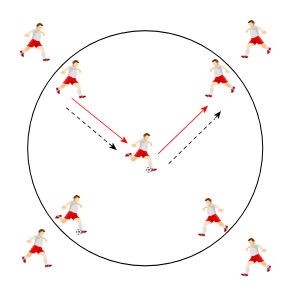
- Players are arranged on 4 corners of a square.
- Two central players receive a pass, turn 180 degrees, pass then follow their pass to the back of the queue.
ACTIVITY PROCEDURES:
- The player passes into the target player who receives the ball, turns 180 degrees and passes the ball to the opposite side.
- The target player then follows his pass and joins the back of the team.
- After making the first pass that player runs into the middle to be the target player.
- Continuous practice, when receiving the ball on the outside of the circle players must pass and follow.
- As the target player collects a pass, turn, pass and follow.
Progressions:
- 2 touch / 1 touch
- Change distance between players by increasing area
- Increase tempo
COOL DOWN/ CLOSURE
Review Skill/Activity, stretching, and questions.
by Neetu | Jun 15, 2020 | Sports
Aim
Holding the Hockey Stick with comfort and confidence.
Equipment Required
1 Hockey Stick, 1 ball, 1 saucer cone per student
Play Area Set-Up
- Create boundaries for a large activity area with large cones.
- Scatter saucer cones throughout the area to create a home base for each student.
Activity Description
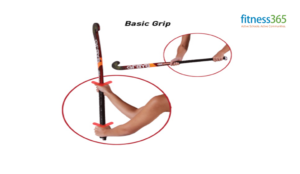
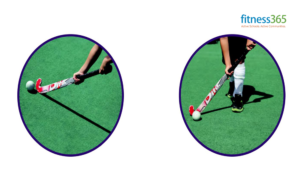
Hockey Grip
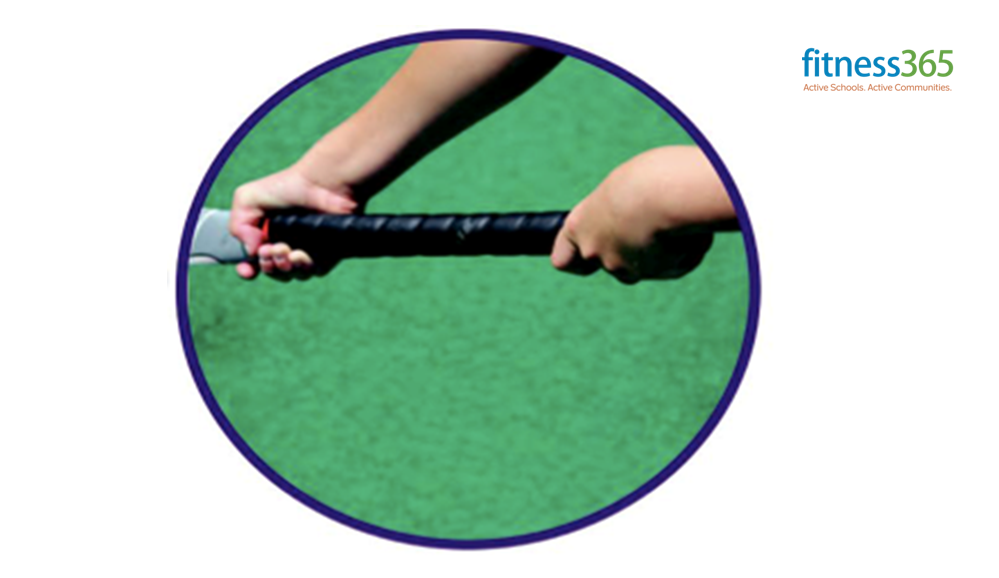
- The firm left-hand grip at the top of the stick
- Turn Stick like opening a door
- Right hand well down the stick
- Forefinger and thumb form a “V”
- Relaxed right-hand acts as a guide
- Used to dribble, trap the ball, and push passing
Step by Step Activity Description
- Demonstrate how the hockey stick has two sides – “Round side” & “Flat side”
- Place stick on the ground – top of the handle in line with your left foot – round side facing up
- Raise your left hand and show your left thumb and index finger pointing to the sky – we call this a “V”
- Position this grip near the top of the handle with the thumb pointing towards the ground and index finger towards the front – wrap thumb and fingers around the stick with your little finger near the top of the handle
- Bend at the knees and lift the hockey stick with the left hand – hold the stick in front of you
- Demonstrate how to use the left hand to turn the stick – Hook points towards the sky – Hook points to the ground – Turn the hook and move the ball from side to side – turn your left wrists thus allowing the flat side of the hook to roll over the ball
- The positioning of the right hand – place right hand under the stick at the end of the handle grip – holding the stick loosely
- Demonstrate holding the stick in the air – turn the toe of the stick towards the sky and ground with right hand on the stick
- The stick will be able to slip through move up and down in the loose right hand like a tunnel
- This demonstration shows how the left wrist turns the stick with the right hand having a soft grip
Athletic Stance
- Wide Base – Feet shoulder-width apart
- Knees slightly bent, slight squat
- Elbows comfortably away from your body
- Head on a ‘swivel’, not looking down!
Step by Step Activity Description
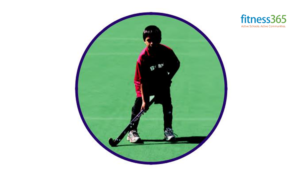
- The stance – bend at the knees (not the back) with left foot forward and stick on the ground
- If players rotate their right wrist towards their left side, then that player is holding the stick too tight with the right hand
- Players stand with left foot forward knees bent – coach walks around and looks at each player’s grip and stance

by Neetu | Jun 15, 2020 | Sports
Aim
To beat the ball back to the wicketkeeper
Equipment Required
- 1 ball
- 8 Cones & 2 stumps per 12 students group
Activity Description
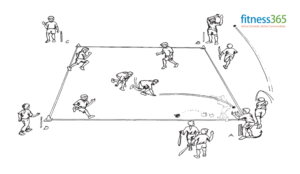
- Form two equal teams
- Set up a ‘baseball-type’ diamond with one player on each base and other fielders inside the area
- The fielding team should have a wicket-keeper at first base
- The batter hits the ball off the tee within the diamond, then runs around the diamond in a clockwise direction
- When the fielder gathers the ball it is first thrown to the wicket-keeper at the stumps from where the ball was hit and then from base to base in an anti-clockwise direction
- If the batter beats the ball back the batting team score a run, if the batter does not, the batter is out
Grade Level Progression
- Game: Introduce new rules such as if players are touched in possession they lose the ball and the ball can be rolled along the ground
- Skills: Have 2 players working together to practice technique under no pressure

by Neetu | Jun 15, 2020 | Sports
Aim
Play cricket using all the skills learned earlier
Equipment Required
- 2 Bats
- 3 balls
- 2 Batting Tees
- 2 Stumps
- 8 Cones
Activity Description
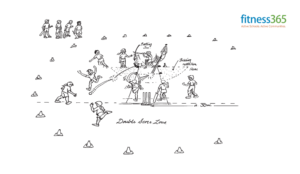
- Each pair bats for 2 overs (12 balls)
- One team bats while the other bowls.
- Each pair bowls for 2 overs (6 balls each partner).
- When a partner is bowling, other partner wicketkeepers.
- A wide ball (one that cannot be reached by the batter in normal stance) results in a free hit from the offside tee and the ball must be hit forward (a hit behind the stumps does not score).
- The batter only gets one swing at the free hit and the fielders cannot move closer until after the free hit has been taken.
- FIELDERS CANNOT FIELD ANY CLOSER THAN 10M FROM THE BATTER
- Only the hit ball is in play.
- Batters can be ‘out’ Bowled, Caught, or Run Out (& only run out from a free hit).
- IF BATTERS GO OUT THEY SWAP ENDS & CONTINUE TO BAT.
- Runs made are doubled if hit into the double score zone.
- Fielding team scores 5 bonus runs for each wicket they take.
- After the batting team has all batted reverse roles.
- Highest score wins
Key Teaching Points: Encourage discussion by teams to develop strategies for results (e.g. who bowls to who, field placements, etc).
by Neetu | Jun 15, 2020 | Sports
Aim
Wicket keeping catching & movement skills
Equipment Require
Activity Description
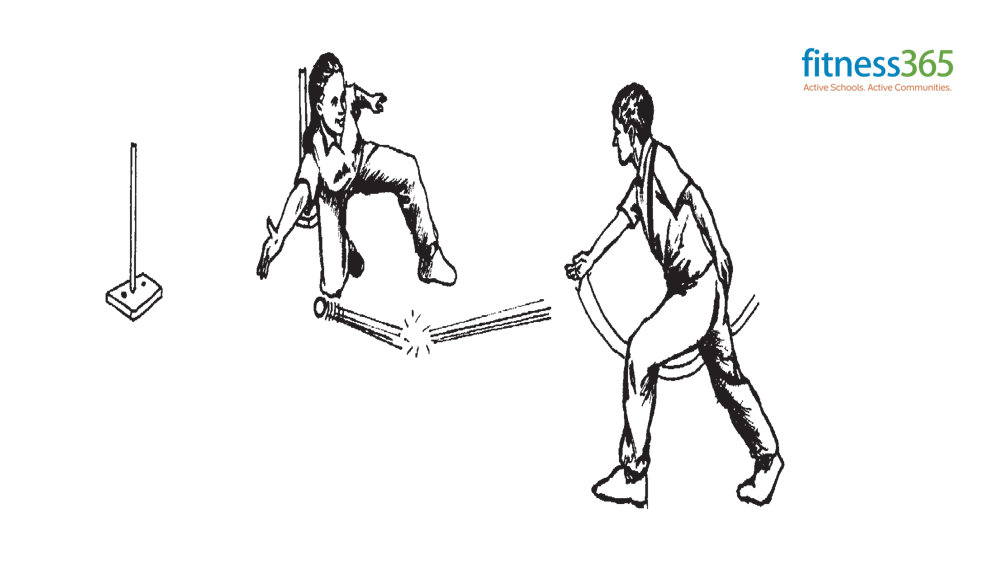
Mark a distance of 5m by using 2 markers. The wicket-keeper stands in the middle of the two markers and has to attempt to prevent any balls from passing through this space. The feeder throws the ball low and wide to extend the wicket-keeper
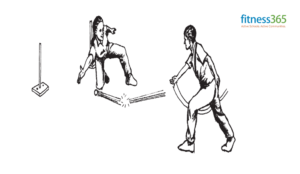
Key Teaching Points: Highlight good catching technique and feet movement
Grade Level Progression
- Increase the size of the space that has to be defended
- Scores can be kept and competition can be had between each player

by Neetu | Jun 15, 2020 | Sports
Aim
For players to catch the ball under pressure and become the winning pair
Equipment Required
2 balls between pairs
Activity Description
- Players form a circle with one ball between each pair. Each person has a partner opposite them in the circle
- Every pair must throw the ball to each other across the circle
- If either person drops the ball both players are out of the game
- The last remaining pair are declared the winners
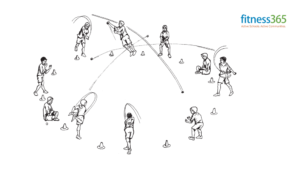
Grade Level Progression
- Introduce one ball for every player, throwing simultaneously
- Have 2 players working together to practice technique under no pressure


