by Neetu | Jun 25, 2020 | Manthan
Aim
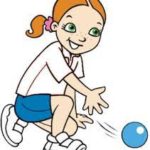
To have students practice the underhand motion of bowling.
Activity cues: “Reach back”, “Arm close to the side of body”, “Step with the opposite foot”
Equipment Require
Plastic 16-20 oz. bottles or bowling pins, Small foam balls, Poly spots
Description
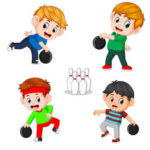
Young children get excited about knocking bowling pins over with a ball. They have very little concern about scoring or other competitive aspects of the formal game. Here are ways to present the activity and two ways to organize the pin set-up.
 Related to both pin setup and presentation
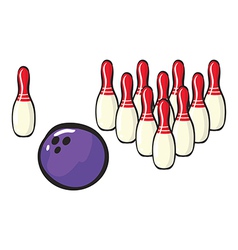
In a traditional sense, the teacher can show children how to set up pins in a conventional manner. Ask them to count the number of pins in each row. First row “1,” second row “1, 2,” third row “1, 2, 3,” and fourth row “1, 2, 3, 4”; then confirm that there is a total of ten pins by counting them all. This integrates numeric concepts into the p.e. activity. If the teacher has placed small round stickers on the floor, younger students will have an easier time putting pins in the same arrangement each time.
In order to maximize participation, this would need to be presented in the context of a number of throwing stations. Otherwise, the teacher would need a lot of pins and balls to keep the group size small.
Pin setup
As an alternative, ask students to design their own pin arrangements and see how the different arrangements affect the way the pins fall.
Presentation
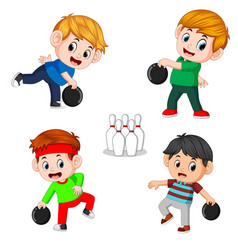
It is preferable that students work in small groups in order to maximize participation. For example, there might be one student bowling while one or two others set up the pins. Students rotate positions. Since the emphasis is on the underhand throw, (as opposed to the number of pins knocked down), the teacher might use less than ten pins in order to accommodate multiple stations. Very young children will perceive a challenge when throwing at maybe 3 pins from an
appropriate distance (appropriate distance maybe 5-7 giant steps away from the roller of the ball and it should not be a regulation size bowling alley length). And, preschoolers can still experiment with various pin arrangements even with only three pins.
For either presentation, each time the students set up their pins, they should return to a poly spot on the floor to make their underhand throw. Initially, the teacher should place more emphasis on the arm swing than other aspects of the throw. The arm swing should begin with a “reach back”, swing forward “close to the body”, and release the ball at a low level (“no bounce”)
(remembering to give only one cue at a time). “Step with the opposite foot” may be an appropriate cue only for students who are more developmentally advanced.

by Neetu | Jun 24, 2020 | Manthan
Aim
To have students practice the underhand motion of bowling.
Activity cues: “Reach back”, “Arm close to the side of body”, “Step with the opposite foot”
Equipment Require
Plastic 16-20 oz. bottles or bowling pins, Small foam balls, Poly spots
Description
Young children get excited about knocking bowling pins over with a ball. They have very little concern about scoring or other competitive aspects of the formal game. Here are ways to present the activity and two ways to organize the pin set-up.
- Related to both pin setup and presentation
In a traditional sense, the teacher can show children how to set up pins in a conventional manner. Ask them to count the number of pins in each row. First row “1,” second row “1, 2,” third row “1, 2, 3,” and fourth row “1, 2, 3, 4”; then confirm that there is a total of ten pins by counting them all. This integrates numeric concepts into the p.e. activity. If the teacher has placed small round stickers on the floor, younger students will have an easier time putting pins in the same arrangement each time.
In order to maximize participation, this would need to be presented in the context of a number of throwing stations. Otherwise, the teacher would need a lot of pins and balls to keep the group size small.
- Pin setup
As an alternative, ask students to design their own pin arrangements and see how the different arrangements affect the way the pins fall.
- Presentation
It is preferable that students work in small groups in order to maximize participation. For example, there might be one student bowling while one or two others set up the pins. Students rotate positions. Since the emphasis is on the underhand throw, (as opposed to the number of pins knocked down), the teacher might use less than ten pins in order to accommodate multiple stations. Very young children will perceive a challenge when throwing at maybe 3 pins from an appropriate distance (appropriate distance maybe 5-7 giant steps away from the roller of the ball and it should not be a regulation size bowling alley length). And, preschoolers can still experiment with various pin arrangements even with only three pins.
For either presentation, each time the students set up their pins, they should return to a poly spot on the floor to make their underhand throw. Initially, the teacher should place more emphasis on the arm swing than other aspects of the throw. The arm swing should begin with a “reach back”, swing forward “close to the body”, and release the ball at a low level (“no bounce”) (remembering to give only one cue at a time). “Step with the opposite foot” may be an appropriate cue only for students who are more developmentally advanced.
Teaching Suggestions:
- For students that easily knock down their pins, challenge them to move their spot back a step after each successful underhand throw.

 Related to both pin setup and presentation


