by Neetu | Jun 25, 2020 | Fitness Activity
Purpose of Event
This activity will give the students the opportunity to learn and practice the overhand throw at a target.
Activity cues
Depending upon the skill level and experience of children use appropriate throwing cues (see PE Central throwing cues)
Equipment Required
Cut snowman targets from large sections of cardboard and decorate by having students draw and paint on the cutouts. Tape snowmen on wall Plastic grocery bags (rolled into balls and taped) are used for snowballs. Use a restraining line, such as a jump rope, to keep students about 5’away from the target.
Description
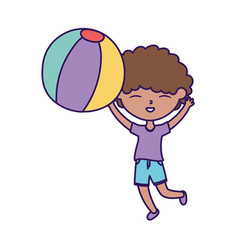
This activity brings the fun of throwing snowballs inside where it is warm, and no one gets cold! Students throw the “snowballs” at the snowman to see if they can hit different parts of the target.
Adaptations for Students with Disabilities
Move target closer to the students if they don’t have the strength to throw the balls to the target. Using plastic grocery bags, you can roll the balls into smaller sizes for students with smaller hands. The rolled bags also allow for better gripping.
by Neetu | Jun 25, 2020 | Fitness Activity
Equipment
4 boundary cones
Spot markers – 1 per student.
Foam ball – 1 per student.
Skill cards – how to hold the ball using both the hand.
Activity
- Ask the kids to stand at their home base and take their personal space.
- Assigned the kids to come to get the ball. (use the strategy like kids standing on the blue home base to collect the ball and placed it in between their legs.)
- Freeze position – put the ball on the ground placing in between two legs.
- Show the kids how to hand the ball (use skill cards).

Stationary dribble
- Ask the kids to place both legs shoulder-width apart holding the ball with both the hands.
- Ask the kids to hold the ball wrist high.
- Go- drop the ball trying to hit the spot markers.
- Catch the ball after the 2nd
- Challenges
– change the level ask the kids to drop the ball from the high level
Catch the ball after the first bounce.
by Neetu | Jun 25, 2020 | Fitness Activity
Purpose of Event:
The purpose of this activity is to introduce young children to the forward roll.
Equipment Require
Foam Incline Wedge Mat (The best foam wedge for young children is one that is 10 inches at the top to 2 inches at the bottom along a 30-inch length. The wedge should be 18″ wide and can be made by cutting dense foam to the described dimensions or purchased through a physical education catalog equipment company.)
Also needed is a wooden box that is 10 inches high and 18 by 18 inches square for the child to stand on. The box can be built out of plywood.
Description
It is much easier for young children to learn to do a forward roll down an incline than it is on a flat surface. Place the wedge up to the edge of the wooden box. Ask the child to stand on the box and face the incline. The child’s hands should be placed on the wedge a few inches from the child’s feet. Point the fingers forward and slightly bend the knees. Ask the child to put their chin on their chest, raise their bottom in the air, and push off with the feet.
Teacher Role:
The teacher should make sure the child’s head is tucked by placing a hand on the back of the child’s head and gently moving the chin toward the chest. Use the other hand to gently push on the child’s bottom to start the roll. The teacher should make sure the child rolls onto the back and shoulders as opposed to rolling onto the head.
Lack of Equipment:
Some preschools may lack enough equipment to allow all children to practice forward rolls at the same time. If this is the case, rolling might best be taught as a station activity. One child works with the teacher at the polling station while the other children practice jumping, balancing, and or other appropriate station activities.

by Neetu | Jun 25, 2020 | Fitness Activity
Purpose of Activity
To teach young children the proper techniques for rolling a ball.
Activity cues: Push, No Bounce
Equipment Require
One playground ball (or another type) per student, Targets (bowling pins, soft drink bottles, pictures taped to the wall, etc.)
Description of Idea
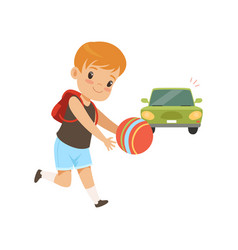
Set up various targets around the activity area. Before moving to the targets demonstrate to children how to roll the ball–stress NO BOUNCE is present in a roll, and show them the difference. Demonstrate how to “push” the ball from a seated position then progress to standing. (This helps to eliminate the “throwing” urge). After several rolling attempts, move students to specified targets, and have them practice knocking things over, hitting pictures, etc. Have students reset targets on their own.
Adaptations for Students with Disabilities:
Students can use feet to roll rather than hands, only roll at stationary pictures, etc.
by Neetu | Jun 25, 2020 | Fitness Activity
Purpose of Activity
This activity will give children the opportunity to practice the skill of throwing overhand. At this developmental age, children should focus on throwing hard at the target. This will enable children to go through the full range of the throwing motion and assist them in “stepping with the opposite foot” when they throw. Stepping with the opposite foot when throwing is an important part of demonstrating a mature throwing pattern.
Equipment Required
A yarn ball, Koosh, or beanbag is most appropriate for this activity inside, a plastic ball, or a tennis ball outside. Make sure the ball or beanbag is the size that will easily fit into the child’s hand. Beanbags or yarn balls are best if inside a building as they will not roll away from the children. A small plastic ball can be used outside in a grassy area where there is less chance for the ball to roll away from the child.
Description
Conduct this activity in a large indoor open space such as a gym or multipurpose room where there is a large wall (free of obstacles) to throw at or a large open outdoor space. Ask children to pick up a beanbag and place it in the hand they are going to use to throw (this should be the same hand they write with). “Bend your elbow up and hold the beanbag behind your head, step forward with the opposite foot, and throw the beanbag as hard as you can.” If inside children should be directed to throw hard at the wall. If outside, ask that they throw as far (or hard) as they can into the open field. Teachers may want to place cones or markers in the field so that children have a large target to throw toward. Remember to stress the cues “throw hard” and “step with the opposite foot.” The throwing skills of young children will vary greatly. Some children may want to get close to the wall while others will need the challenge of being farther away. While this activity seems very simple it is an important foundational first step activity for young children learning how to throw.

Note: If children are having trouble stepping forward when they throw, place a tape line, jump rope, or chalk line on the ground and ask that children step over the line when they throw. This will help them begin to develop the opposite foot stepping pattern.
Variations:
As children get the basic concept of throwing hard while stepping with the opposite foot use targets to challenge them to keep practicing. Use large targets indoors such as painting a target on a large sheet and then attaching to the wall. Outdoors, Provide a restraining line for children to stand behind and ask that they throw over another line that is 20 to 30 feet away. Provide a line that is closer to those that cannot throw as far.
Teaching Suggestions:
With young children, it is important to participate in throwing activities that are both fun and success-oriented. Research tells us that children need to be successful about 80% of the time to stay on task, to avoid frustration, and to have the best opportunity to develop skills. Children, who consistently miss the target when they throw, may get frustrated and not practice. Throwing activities must be success-oriented in order that children will have the opportunity to develop the skill. The best beginning throwing activity is to simply ask children to throw hard. This allows children to naturally step with their opposite foot when throwing and assists in the development of a mature throwing pattern.
Adaptations for Students with Disabilities:
Many children with special needs may not be able to step when throwing. Ask these children to throw as hard as they can and make sure they have the opportunity to stand as close to the wall or target as needed.

by Neetu | Jun 25, 2020 | Fitness Activity
Activity
Let the child sit in their personal space.
Give the foam ball each to the kids.
Tell them to keep the ball on their lap when they are sitting down.
Exploration 1: –
Explain the shape of the ball and let them feel it.
Explain to them also the color of the ball.
You can ask them which fruits resemble the shape of the ball?
Exploration 2: –
Ask the kids to place the ball in various directions and levels
- placed it above your head
- Placed it over the knees
- Placed on the right side of the body
- Placed it on the left side of the body.
Exploration 3: –
- Ask the kids to roll the ball around their home base.
- Ask the kids to leave their home base rolling the ball in the general space.
Exploration 4: –
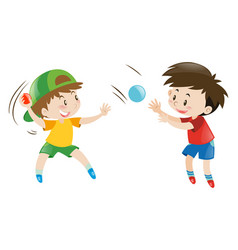
- Let the kids face each other and roll.
- Ask the kids to roll the ball to their partners.
Debriefing: –
Ask about what we have done today.
Put music and do a mild stretching.
