by Santosh | Jun 16, 2020 | Fitness Activity
LEARNING OUTCOME
Develops key defending concepts such as anticipation and spatial awareness.
TEACHING CUES
- Ensure a smooth playing area surface with adequate space between players and other games.
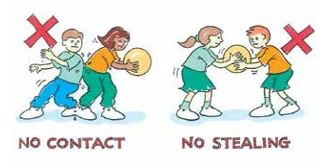
- Enforce the ‘no contact’ rule.
- The ball cannot be taken from another player’s possession.
ACTIVITY SET-UP AND PROCEDURE
EQUIPMENT:
- Volleyball/netball court or similar area with end-zones marked
- One ball per group (volleyball size)
- Markers to mark playing area/end-zones
- Coloured bibs
- Stopwatch
SET-UP:
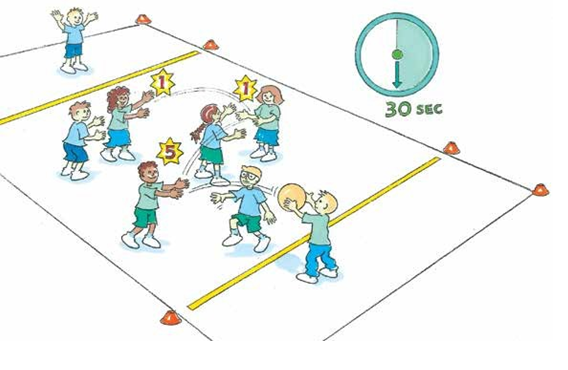
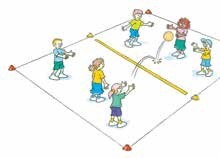
- Attackers score points by passing to each other for 30 seconds.
- For bonus points the ball is passed to a team‑mate in one of the 2 end‑zones.
- Defenders try to intercept the ball. The game is readily adapted to a wide range of ability levels.
ACTIVITY PROCEDURES:
Attackers
- Have 30 seconds to score as many points as possible.
- End‑zone – one attacking player only, all team members have a turn.
- Option – the player passing the final ball has a turn in the end-zone.
Defenders
- Must stand 1m from attackers; no body contact.
- No restriction on the number of defenders in the end zone.
- If the defenders intercept the ball it is placed on the ground for an attacker to resume play. Play continues for attackers until 30 seconds elapses, then the ball changes over.
COOL DOWN/ CLOSURE
Review Skill/Activity, stretching, and questions.
by Santosh | Jun 16, 2020 | Fitness Activity
LEARNING OUTCOME
Develops defending skills and can be easily modified to develop the object control skills of catching, throwing, kicking and striking.
TEACHING CUES
- Try to match the abilities in each square.
- Make sure all players are included
- No physical contact.
ACTIVITY SET-UP AND PROCEDURE
EQUIPMENT:
- The indoor or outdoor playing area
- Variety of balls of different size, weight and density
- 10 marker cones
- Coloured bibs
SET-UP:
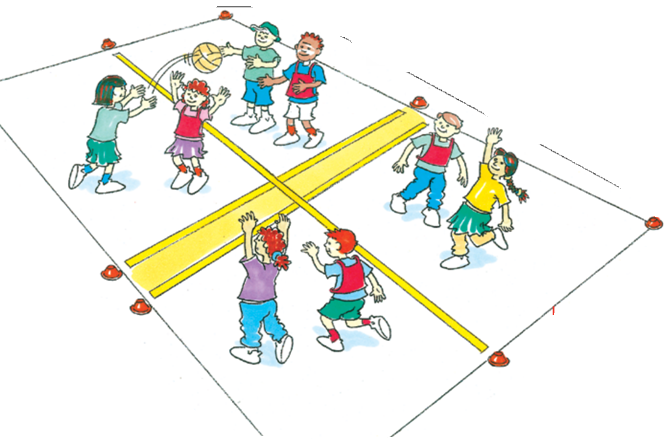
- 8 players are divided into 2 teams.
- A playing area is divided into 4 and a player from each team goes into a square.
- The team in possession of the ball passes it to team‑mates in any of the 4 squares, trying to avoid interception.
- Players remain in their square.
ACTIVITY PROCEDURES:
- One team takes possession of the ball (receivers) and tries to make as many passes as possible between themselves. The other team (interceptors) tries to intercept the ball.
- Players can pass in any direction – no running with the ball.
- All players must remain in their own square.
- If the interceptors catch the ball or knock it out of play, they take possession.
- Winners are those who score the highest number of consecutive passes.
COOL DOWN/ CLOSURE
Review Skill/Activity, stretching, and questions.
by Santosh | Jun 15, 2020 | Fitness Activity
LEARNING OUTCOME
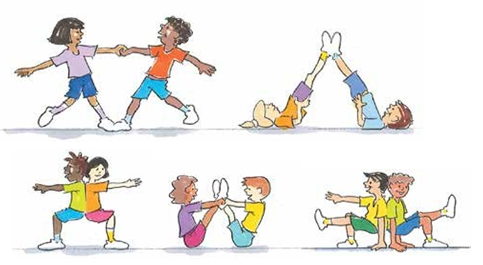
Introduces making and holding shapes in groups, which is needed for many balancing activities
TEACHING CUES
- Make sure players are performing their balance on their mat or soft grass.
- Do not allow players to use their head as a balance option.
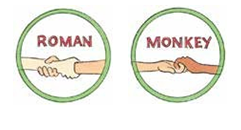
- Ensure players securely ‘brace’ one another with appropriate hand grips (e.g. the monkey grip or Roman grip). These must be firm and strong.
ACTIVITY SET-UP AND PROCEDURE
EQUIPMENT:
1 scatter mat per pair or a soft grassed area
SET-UP:
- Match participants appropriately.
- Make sure players are controlling their exits from the balance.
ACTIVITY PROCEDURES:
- On ‘GO!’, pairs move freely
around the room holding hands until they hear your signal.
- Call out combinations including any of the following: feet, bottom, shoulders, knees, hands, backs, elbows.
- Players find a mat and assume the position called (e.g. if you call out ‘THREE HANDS, TWO FEET!’, pairs form a balance with only these number of body parts touching the ground).
- Players hold their position for a set time (e.g. 10 seconds).
- Players must always be in contact with one another to maintain balance.
Variations:
- Balance with a partner who is of a different size.
- Introduce equipment (such as hoops, balls, and bean bags) that must also be used in the balance.
COOL DOWN/ CLOSURE
Review Skill/Activity, stretching, and questions.
by Santosh | Jun 15, 2020 | Fitness Activity
LEARNING OUTCOME
Develop the concepts of finding space, anticipation, teamwork, and deception.
TEACHING CUES
- Demonstrate the activity using players from the group.
- Let the game run a little before any intervention – ‘let the kids play!’
ACTIVITY SET-UP AND PROCEDURE
EQUIPMENT:
- One volleyball or similar per pair
- A court surface that allows the ball to bounce
- 6 markers per court
SET-UP:
- Form pairs – see Form a Group
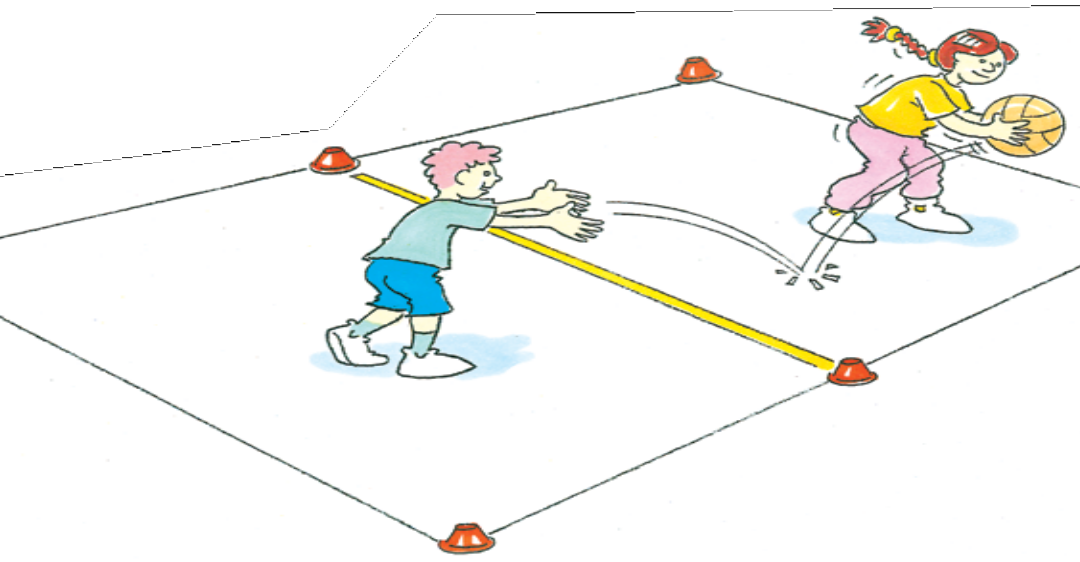
- Players in position as shown – player with the ball serves.
ACTIVITY PROCEDURES:
- The ball must cross the line above waist height.
- Play continues until one player cannot return the ball after one bounce, or the ball is thrown out of court, or the receiver drops the ball.
- The serve alternates between players.
- Play to a specified number of points, (e.g. 5) or a set time limit (e.g. 3 minutes).
Variations
- Play 3 v 3 – alternate serves between teams. Ensure each player has an opportunity to serve.
- Restrict the time in possession depending on the ability of the players (e.g. 3 seconds or more).
- Provide a ‘no-go’ or bounce-free zone.
- Restrict the type of passes that players can use (e.g. chest pass, one handed pass, overhead pass, underarm pass).
- Allow students to select different rules to suit their ability and make the competition more even (e.g. one student is allowed two bounces and their opponent only one).
COOL DOWN/ CLOSURE
Review Skill/Activity, stretching, and questions.
by Santosh | Jun 15, 2020 | Fitness Activity
Movement skills/concepts
Rolling along a long axis, relationships (with others), problem solving and timing.
Set-up
Grass or tumbling mats. Groups of four-five.
Activity
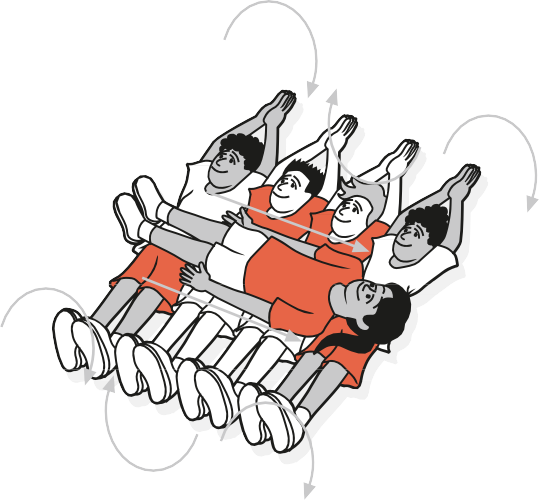
Children lie side by side, shoulder to shoulder to form a conveyor belt. One child lies on their back across the conveyor belt. On a signal, all children in the conveyor belt rotate in the same direction, moving the top child along the conveyor belt.
How far can you travel, keeping the child on the belt?
Can you see …?
- individuals maintaining a long, straight body
- conveyor belt staying close together
You could ask …
What can you do to ensure you move together in the conveyor belt?
Variations
Use soft toys: Line up soft toys as the conveyor belt for the children to roll over.
Increase number of children: Make the conveyor belt longer with more children. Also make it continuous – after the top child passes over the belt, they quickly get up and add themself to the front of the belt.
COOL DOWN/ CLOSURE
Review Skill/Activity, stretching, and questions.