by Neetu | Jun 23, 2021 | Manthan
Aim
- Move the ball while moving forward without losing the contact with the stick – keeping under control
- Follow directions by keeping control of equipment and body in order to keep safe and active.
Equipment Required
1 Hockey Stick, 1 ball per student, saucer cones, 4 Large cones for boundary
Play Area Set-Up
- Create boundaries for a large activity area with large cones.
- Line up cones to mark the starting point and endpoint of the dribble. Each student to line up behind the cone.
- Make lanes according to the number of students to allow Dribble with the ball in a straight line for 10m.
Activity Description
Grip & Stance
- Use basic grip
- The left hand grip the stick at the top of the handle and turns it
- The right hand has a loose grip and allows the stick to be turned but also steers the direction of the stick
- Body position is low (knees bent leaning forward) with the arms extended in front of the body
- The stick is positioned with left hand close to the body and right hand out in front – comfortable stance
- The ball is in front of the body (approximately 1 stick length from the player’s ankle)
Movement:
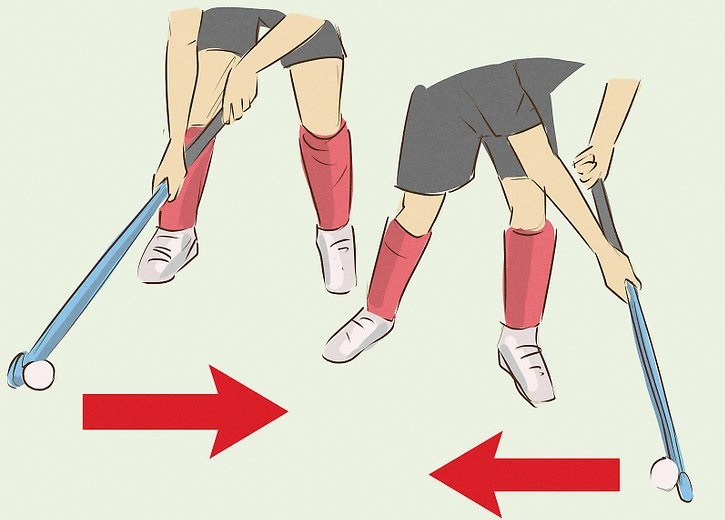
- Move the ball from right to left – left to right across the body and roll the stick over the ball – no daylight between stick and ball
- Increase the distance of the Indian dribble – start ball, stick, and wrists outside the right side of the body and drag to outside their left
- Keep the ball in front of the body and look up during dribbling (vision)
- Transferring your weight to increase the length of the drag
- Push off on your right foot with the ball on the forehand side – Push off a left foot with the ball on the reverse stick side
- Stick and ball on the right side – look at the time on your watch
TEACHING POINTS FOR INDIAN DRIBBLING
- Keep the ball close to your stick
- Carry the ball out in front & to the side of the right foot
- Bend at the knees–straight back–chin up
- Learn to look up while moving so that you can see what is happening around you and you won’t collide with anyone else
- Roll stick over the front of the ball to stop the ball from moving forward & protect
- The only flat side of the stick can touch the ball
GAME: Red Light Green Light (with INDIAN DRIBBLE)
- It’s time to play Red Light, Green Light while we dribble our footballs. Cars use gasoline as fuel and some use electricity. Our bodies use Calories for fuel and we get Calories from food. When we’re physically active, we burn calories. It’s important that we eat healthy food in order to refuel our bodies. Who can give me some examples of healthy foods?
- Your goal is to dribble your football over the end line where I’m standing. I will be at the traffic light first
- When I call out “Green Light,” you will start to dribble toward the other end line. When I call out “Red Light,” you have to stop and freeze immediately, keeping control of your football
- Any student who doesn’t stop on time must go back to the start.
- When you cross the end line that I’m standing on, you score a point and we’ll restart the game
by Neetu | Jun 23, 2021 | Manthan
Aim
- Use of soft touches on the football in order to keep it in personal space.
- Able to understand and demonstrate positions using the correct vocabulary.
Equipment Required
- 1 football per student
- 1 Saucer cone per student
- Boundary cones
Play Area Set-Up
- Create boundaries for a large activity area with large cones.
- Scatter saucer cones throughout the area to create a home base for each student.
- Each student to a cone with a ball.
Activity Description
- Only do the task when the trainer says “TEACHER Says.”
- If you don’t hear me say “TEACHER Says,” then keep on doing the activity that you were already doing. If you do an activity given without hearing “TEACHER Says,” then do 3 jumping jacks in your personal space before getting back into the game.
- Put 1 foot on the ball, then other foot on the ball; Alternate toe touches on top of the ball; Move around the ball (clockwise / counter-clockwise); Stand (in front, behind, to the side) of the ball; Step over the ball; Side-to-side toe taps.
KEY TEACHING POINTS – Stay Ready (balanced stance, knees slightly bent), Soft Touches with Ball.

by Neetu | Jun 23, 2021 | Manthan
Aim
Allow young children the opportunity to explore dribbling a ball with their feet
Equipment Required
- Boundary cones
- Jump ropes or tape
- Footballs (preferably slightly deflated balls so they don’t lose control)
Play Area Set-Up
- Set up the playing area with a different length of jump rope or tape pathways. Have the children get a ball and take the ball to the beginning of one of those pathways.
Activity Description
- On the signal have the students use their feet to move their bill through the pathway using “soft touches” with their feet. Have them use both the inside and outside of their feet when they are dribbling?
Suggestions:
- Tape jump ropes to the floor to help keep them in place.
- Use arrows/saucers to guide the children.
- To vary the task (for the higher-skilled) you may want to have students work in partners. Have one partner dribble the ball forward a few times, then gently pass it to his or her teammate. Play continues back and forth.
by Neetu | Jun 23, 2021 | Manthan
Aim
To have students practice the underhand motion of bowling.
Activity cues: “Reach back”, “Arm close to the side of body”, “Step with the opposite foot”
Equipment Require
Plastic 16-20 oz. bottles or bowling pins, Small foam balls, Poly spots
Description
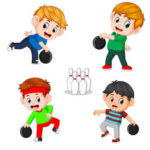
Young children get excited about knocking bowling pins over with a ball. They have very little concern about scoring or other competitive aspects of the formal game. Here are ways to present the activity and two ways to organize the pin set-up.
- Related to both pin setup and presentation
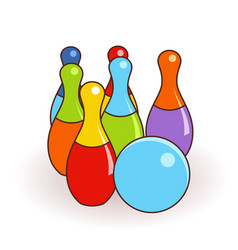
In a traditional sense, the teacher can show children how to set up pins in a conventional manner. Ask them to count the number of pins in each row. First row “1,” second row “1, 2,” third row “1, 2, 3,” and fourth row “1, 2, 3, 4”; then confirm that there is a total of ten pins by counting them all. This integrates numeric concepts into the p.e. activity. If the teacher has placed small round stickers on the floor, younger students will have an easier time putting pins in the same arrangement each time.
In order to maximize participation, this would need to be presented in the context of a number of throwing stations. Otherwise, the teacher would need a lot of pins and balls to keep the group size small.
- Pin setup
As an alternative, ask students to design their own pin arrangements and see how the different arrangements affect the way the pins fall.
- Presentation
It is preferable that students work in small groups in order to maximize participation. For example, there might be one student bowling while one or two others set up the pins. Students rotate positions. Since the emphasis is on the underhand throw, (as opposed to the number of pins knocked down), the teacher might use less than ten pins in order to accommodate multiple stations. Very young children will perceive a challenge when throwing at maybe 3 pins from an appropriate distance (appropriate distance maybe 5-7 giant steps away from the roller of the ball and it should not be a regulation size bowling alley length). And, preschoolers can still experiment with various pin arrangements even with only three pins.
For either presentation, each time the students set up their pins, they should return to a poly spot on the floor to make their underhand throw. Initially, the teacher should place more emphasis on the arm swing than other aspects of the throw. The arm swing should begin with a “reach back”, swing forward “close to the body”, and release the ball at a low level (“no bounce”) (remembering to give only one cue at a time). “Step with the opposite foot” may be an appropriate cue only for students who are more developmentally advanced.
Teaching Suggestions:
- For students that easily knock down their pins, challenge them to move their spot back a step after each successful underhand throw.

by Neetu | Jun 21, 2021 | Manthan
Learning Outcome
To learn to juggle increase their brains’ grey matter! While juggling may seem and be difficult to master at first, it becomes easier once you’ve learned the basics and practiced it. This article takes you into the basics of three-ball juggling, after which you can begin to introduce more balls.
Activity Description
1. Choose suitable balls. Beanbags are good for beginners. Basically, find balls that will not bounce a lot, or roll away when they’re dropped––this will save a fair bit of running initially! A set of beanbags can be bought for a very low price or made by hand. Tennis balls filled with sand or a few pennies and covered with a round balloon also work well. They don’t bounce and they provide a slip-free grip.
2. While you’re at it, choose a suitable place to work in. At the very beginning, balls will end up flying everywhere, so it’s best not to stand near granny’s precious oil lamp or dad’s collection of ceramic cows.
Toss one ball for a while to get the feel of juggling. Start passing one ball from one hand to the other. Also practice “selfies” –– these are throws you catch with the throwing hand. The ball should come to eye height or higher. Your hands should not move very much, so aim to keep your elbows at your hips.
3. Practice scooping. This is a technique to make juggling smooth. Simply scoop, or dip, your hand before tossing the ball. Keep the dip shallow though; it isn’t going to work if you scoop too deeply. Practice scooping and tossing from one hand to another, so that arc does not rise above eye level.
4. Simply mimic the movements of jugglers. If you were to “air juggle,” do you find yourself moving your hands in small circles? You’re already scooping! Take one ball in each hand. Toss ball A, and when it reaches the top of its arc, toss ball B. Practice until this simple exchange becomes comfortable.
5. At the top is key here. This will give you the most time for your next catch. When you start working with 3, 4, and 5, this becomes especially important.
6. Juggle three balls. Try to make three passes in a row. Start out slowly, simply seeing how the three work together in the air in one rotation. Juggling three is often a matter of understanding the balls’ trajectories and how they intertwine. For the majority of the time, one will be in the air while each hand has the other two.
7 . First, hold two balls in your right hand and one in your left hand. (Vice versa if you are left-handed.)
Begin with passing from the right hand. (Again, vice versa if you are left-handed.)
Throw the ball to your left hand and when ball 1 is at the peak, throw ball 2 (the only one in your left hand) under ball 1 to your right hand.
When ball 2 is at the highest point (at this point, you should also catch ball 1 in the left hand) throw ball 3 under ball 2.
And when ball 2 is in the right hand just catch ball 3 and this should be it. That’s all you do! Repeat away.
If you can’t seem to get the hang of it, work with light, small scarves. They’ll give you the time hanging in the air to understand how it all comes together
Work on the over-the-top method. Now that you’ve got the simple three-ball cascade down, start juggling “over the top.” This is the name for scooping in the opposite direction with one hand. Instead of scooping under and releasing the ball, you catch it, scoop to the outside and throw it over, hence the name.
You can start by juggling a normal “Three Ball Cascade,” and then letting one of the balls do an over-the-top all the time so that 1/3 of all throws are over-the-top throws. If you make one hand throw over-the-top throws every time, you are juggling a “Slow Shower,” and if every throw is an over-the-top throw, you are juggling a “Reverse Three Ball Cascade.” When you have learned this, you can advance onto things like cross-hand juggling, columns (one in the middle, two on the sides), and “Mills’ Mess.”
Move onto four and five balls. Learn to juggle two in one hand, then do two in your left hand and two in your right hand at the same time. For some, juggling four is simpler than three!
8.Juggling five balls is just like juggling three, but you have to move your hands a lot faster and you need to throw the balls higher. Keep practicing –– it takes time and patience to master.
Required Material
4 Boundary cone, small ball 3, paper ball


