by Neetu | Jul 2, 2020 | Sports
Aim
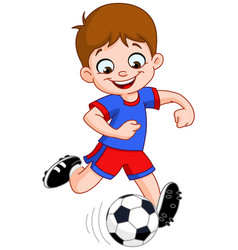
Allow young children the opportunity to explore dribbling a ball with their feet
Equipment Required
- Boundary cones
- Jump ropes or tape
- Footballs (preferably slightly deflated balls so they don’t lose control)
Play Area Set-Up
- Set up the playing area with a different length jump rope or tape pathways. Have the children get a ball and take the ball to the beginning of one of those pathways.
Activity Description
- On the signal have the students use their feet to move their ball through the pathway using “soft touches” with their feet. Have them use both the inside and outside of their feet when they are dribbling?
Suggestions:
- Tape jump ropes to the floor to help keep them in place.
- Use arrows/saucers to guide the children.
- To vary the task (for the higher-skilled) you may want to have students work in partners. Have one partner dribble the ball forward a few times, then gently pass it to his or her teammate. Play continues back and forth.
by Neetu | Jul 2, 2020 | Sports
Aim
This activity will give children the opportunity to practice the skill of kicking a ball. At this developmental age, each child should focus on kicking the ball hard so it travels far away from the child. Kicking the ball “as hard as you can,” will assist children in developing kicking skills as the motion of kicking hard forces the child to go through the full range of motion with the kicking leg.
Equipment Required
A 10-inch diameter rubber playground ball or foam or soft covered soccer ball. Do not use regulation soccer balls with hard coverings that may hurt a child’s foot when kicked. This may discourage children from practicing. Practicing kicking skills is an outdoor activity and should not be done inside. A large grassy area is ideal for this activity.
Activity Description
- Initially ask children to place the ball on the ground and ask that they take one step back and kick the ball hard and as far away as possible.
- Children then retrieve the balls and kick again. After children get the idea of kicking far, ask that they take several steps back away from the ball and run toward the ball and kick it.
- It may be helpful to place cones or markers out in the field so that children have a direction in which to kick.
- A marker or cone in the field can also be used to challenge children to kick farther. “Show me how far you can kick the ball. See if you can kick the ball past the cones.” Initially place cones about 10 to 12 yards away.
Variations
As children get the basic concept of kicking far and hard ask that they travel throughout the grassy area continually kicking their ball. “Kick your ball far and then run up and kick it again.”

by Neetu | Jul 2, 2020 | Sports
Aim
- Use of soft touches on the football in order to keep it in personal space.
- Able to understand and demonstrate positions using the correct vocabulary.
Equipment Required
- 1 football per student
- 1 Saucers cone per student
- Boundary cones
Play Area Set-Up
- Create boundaries for a large activity area with large cones.
- Scatter saucer cones throughout the area to create a home base for each student.
- Each student to a cone with a ball.
Activity Description
- Only do the task when the trainer says “TEACHER Says.”
- If you don’t hear me say “TEACHER Says,” then keep on doing the activity that you were already doing. If you do an activity given without hearing “TEACHER Says,” then do 3 jumping jacks in your personal space before getting back into the game.
- Put 1 foot on the ball, then other foot on the ball; Alternate toe touches on top of the ball; Move around the ball (clockwise / counter-clockwise); Stand (in front, behind, to the side) of the ball; Step over the ball; Side-to-side toe taps.
KEY TEACHING POINTS – Stay Ready (balanced stance, knees slightly bent), Soft Touches with Ball.
by Neetu | Jul 1, 2020 | Sports
Aim
Practice more of kicking and dribbling skills with an objective.
Equipment Required
- Spot markers
- Foam/footballs
- Four cones
Play Area Set-Up
- Create a ‘neutral area’ between the two teams where no player is allowed. This area can be as small as one yard and as big as 10 yards wide. The width is determined by how far the players can kick the ball.
Activity Description
THE GAME:
- Each player starts with a ball at his or her feet.
- On command, each team tries to keep their side of the game zone free of balls by kicking their ball over to the other team’s side.
- After an appropriate amount of time (when the balls become too scattered, or the players are losing focus), stop the game and count which side has the most balls on their side.
- Distribute the balls evenly for another try if the players are still interested.
After players have found some success with this basic game, try these variations:
- Players can only use their left foot.
- They can throw the ball back.
- They must dribble the ball around a cone that has been set up in the middle of their “yard” and then kick it back.
by Neetu | Jul 1, 2020 | Sports
Aim
- To improve a student’s ability to dribble the football
Equipment Required
- A ball for each student – different colors or numbers.
- Different colored hoops or cones.
- Colored armbands.
- Spot markers.
- Music
Play Area Set-Up
- Spread the kids and give each of them a football
Activity Description
Repeat the Name Game
- Players stand in a circle and pass the ball to one another, but they must call out the name of the person they are passing to. This is great at the beginning of the session, so they (and you!) learn everyone’s names.
Main Game
- Everyone dribbles their football around the play area. When the music stops, students stop their ball completely and find a different colored ball.
- Different colored hoops or colored cones are on the floor. The hoops could be hanging from six different basketball hoops to help students keep their eyes off the ball. Students dribble their new colored ball to the matching colored hula hoop or cone and perform toe taps. Tap the ball with the sole of the right foot and then the left. Once all students are there, begin again. Place a different colored armband around the arch of each foot. Have students focus on using just the right foot (could be the blue band) or the left (could be the red band).
Variations
- Continue the activity and keep challenging the students with various dribbles, i.e., right foot, left foot, soccer dribble, change pathways, kick into the wall, follow a friend, rollover spots, tap into a cone, go under hurdles, and/or kick into a taped box on the wall.
Teaching Suggestions:
Be sure to review the cue words to help students understand the concept.


