by Neetu | Jun 17, 2020 | Fitness Activity
Posture: Nataraja-asana (The King of the Dance Pose)
(Pronunciation: nah-tah-raj-ah-sa-na)
Description:
The Sanskrit word nata means dancer and raja means king. Nataraja is another name for Shiva, the Lord of the Dance, whose cosmic dance is the creation and destruction of the world.
Performing Instructions:
- Stand with the feet together and the arms by your sides (see the tad-asana).
- Inhale and bend the right leg backward grasping the left foot with your left hand while simultaneously extending the right arm straight out in front.
- Continue raising the right arm upward until it is about 45 degrees from the floor while lifting the left leg as high as possible with the left arm.
- Hold the posture while breathing gently through the nostrils. Keep your gaze fixed slightly above the horizon.
- Remain in the nataraja-asana for about one minute then return slowly to a standing position. Repeat by reversing directions 2-4.
Comments:
Perform the nataraja-asana gracefully as if dancing, yet firmly with focused attention.
This posture helps to strengthen your sense of balance and concentration. The arch formed by the back and stretched leg gently aligns the vertebrae of the spine restoring suppleness and easing strain caused by poor posture or long periods of sitting. It tones the muscles of the hips and legs as well as stimulates the chest muscles.
Duration/Repetitions
Begin by holding the nataraja-asana for about a minute and gradually increase the time as you become more comfortable with this posture. Repeat it three times on each side, alternately from right to left.

by Santosh | Jun 17, 2020 | Soccer, Sports
LEARNING OUTCOME
To improve dribbling technique
TEACHING CUES
- What part of the boot to use when dribbling (inside, outside, sole)
- Head up / vision / awareness
- Encourage players to use both feet
- Encourage players to increase tempo.
ACTIVITY SET-UP AND PROCEDURE
EQUIPMENT:
- Marked area
- 3 cones
- 1 ball per player
SET-UP:
ACTIVITY PROCEDURES:
- Players dribble around a triangle of cones for 1 minute continuously.
- They can go round in any order or direction.
- Continuous practice.
Progressions:
- Increase the distance between the cones
- Players must incorporate turns and tricks
- Add another player to dribble around the same cones
COOL DOWN/ CLOSURE
Review Skill/Activity, stretching, and questions.

by Santosh | Jun 17, 2020 | Soccer, Sports
LEARNING OUTCOME
To improve dribbling techniques
TEACHING CUES
• Players encouraged to use both feet
• Emphasis is on keeping the ball close to feet and keeping control of the ball
• Encourage players to use tricks and pieces of skill
• Feints/drop shoulder, nutmegs, knock & run, big toe little toe, etc.
ACTIVITY SET-UP AND PROCEDURE
EQUIPMENT:
Cones and 1 ball for each player.
SET-UP:
- Set up the cones in a marked off area, with five on the starting line and four opposite these, as shown. Between cones three and four and seven and eight, place at least four more cones.
ACTIVITY PROCEDURES:
- Dribble the ball from cone one to cone nine.
- Players dribble to cone two and back down to cone three.
- Players then dribble in and out of the cones up to cone four, dribble back to five, up to six and down to seven.
- Players then dribble in and out of the cones up to cone eight and back down to nine, then back to one and start again. 5 laps.
Progressions:
- Encourage players to run at pace
- Mirror the practice and have races
- Time each lap as a target for each player to beat
- Move cones closer together to challenge skills
COOL DOWN/ CLOSURE
Review Skill/Activity, stretching, and questions.
by Neetu | Jun 17, 2020 | Fitness Activity
Posture: Dhanura-asana – The Bow Pose
(Pronunciation: dha-noor-ah-sa-na)
Description:
The Sanskrit word dhanur means bow-shaped, curved or bent. The bow referred is a bow as in “bow and arrow.” This asana is so named because the body mimics the shape of a bow with its string stretched back ready to shoot an arrow.
Performing Instructions
- Lie flat on the back in the shava-asana (corpse pose).
- Lie on the stomach with the head turned to one side and the arms alongside the body with palms facing upward.
- Turn the head and place the chin on the floor. Exhale, bend the knees, reach back with the arms and grasp the right ankle with the right hand and the left ankle with the left hand.
- While inhaling, slowly raise the legs by pulling the ankles up and raising the knees off the floor while simultaneously lifting the chest off the floor. Hold the inhale breath. The weight of the body should be resting on the abdomen.
- Tilt the head as far back as possible. Hold the posture as long as you can comfortably hold the inhale breath.
- Slowly exhale bringing the knees to the floor, release the ankles, slowly bring the legs and arms straight down on the floor and turn the head to one side, assuming the prone posture you began with.
Comments:
The most obvious benefit of the dhanur-asana is that it restores flexibility to the spine. Regular practice will relieve lower back pain and release tension and strain in the upper back and neck area. The alternating stretching and releasing of the abdominal muscles increases blood flow to this area and aids all sorts of digestive disorders and discomforts. Strain or fatigue in the legs is also released after a few repetitions. Extended practice will help develop upper-body strength.
Duration/Repetitions:
The dhanur-asana is either held for the duration of the inhaled or between one and three minutes while breathing gently through the nostrils. Repeat it two or three times.
Variations:
The two variations of the dhanur-asana have to do with the method of breathing and the amount of arch of the back. As one progresses with this asana and is able to hold the posture for a longer period of time, the posture can be held while slow, rhythmic breathing is maintained through the nostrils. As the spine becomes more flexible try drawing the feet closer to the head. Some are able to join the top of the head to the soles of the feet although this is certainly not necessary to accomplish the dhanur-asana.
by Neetu | Jun 17, 2020 | Fitness Activity
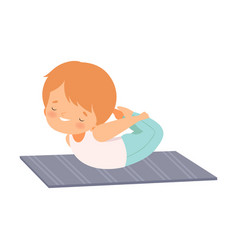
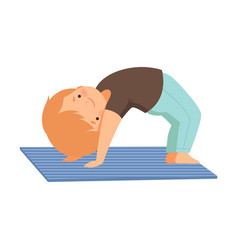
Posture: Chakra-asana (The Wheel Pose)
Pronunciation: chu-krah-sa-na
Description:
Chakra, from the root cak (“to move”) means wheel and therefore this is the Wheel Posture.
The cakra-asana is also known as the urdhva-dhanurasana.
Urdhva means raised, elevated or upright and dhanur means bow. Both “wheel posture” and “raised bow posture” describe the appearance of this asana.
Performing Instructions
- Lie flat on the back in the shava-asana (corpse pose).
- While exhaling bend the knees and bring the feet as close to the buttocks as possible with the soles of the feet flat on the floor.
- Bend the arms at the elbows and place the palms of the hands flat on the floor directly under each shoulder with the fingers pointing toward the back.
- While inhaling slowly, begin to raise the head, back, and buttocks off the floor while arching the spine. Continue to press downward on the hands and feet while raising the hips and stomach as high as possible.
- Hold for the duration of the held inhaled breath. When you can’t hold the breath comfortable any longer, slowly exhale and return the back to the floor, slide the legs out straight returning to the shava-asana.
Comments:
The chakra-asana is more challenging than most other yoga postures. Don’t be discouraged if you are unable to accomplish it right away. Even attempting this posture without successful completion holds great benefits.
First and foremost is the strength and suppleness it restores to the spine. It strengthens the arms, shoulders, and upper back as well and stimulates the cardiovascular system. The chakra-asana has an overall tonic effect on the entire body.
As the natural suppleness of the spine is restored after a period of practice you can begin to perfect the form of this asana and thus experience greater benefits.
First, be certain that the arms are as straight as possible with very little to no bend in the elbows. When you can hold this comfortably, begin breathing through the nostrils while holding the posture and attempt to get a greater arch in the spine by bringing your hands closer to your feet and/or bringing your feet closer to your hands. Finally, you can extend the duration of the chakra-asana by doing several repetitions in sequence without resting in-between. As you return from the posture keep the hands behind the shoulders and the soles of the feet flat on the floor and as soon as the back returns to floor immediately raise it and enter the full posture again.
Duration/Repetitions:
The chakra-asana is either held for the duration of the inhaled breath or between one and three minutes while breathing gently through the nostrils. Repeat it two or three times.
The “Bridge” Variation:
Although this variation is much easier to perform than the full chakra-asana, it shares several of its benefits. In particular, it will help to stretch the spine and relieve tightness in the upper back and shoulder area.
To get the full benefit of the bridge variation continual effort should be applied to raising the back upward and creating the greatest possible arch with the spine.
While holding the bridge breath slowly through the nostrils. If there is no discomfort felt in the spine or shoulders then one should advance to the full variation of the chakra-asana as described above. Both variations strengthen the back and promote the flexibility of the spine. Tightness in the back and spine results from poor posture, stress, a sedentary lifestyle, and/or emotional disturbances. You should begin to feel the tightness being released after just a few repetitions.