by Neetu | Jun 16, 2020 | Fitness Activity
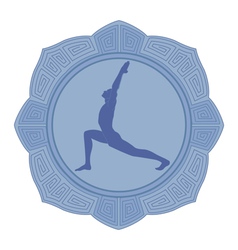
Posture: Anjanaya-asana – The Salutation Pose
(Pronunciation: Ahn-jah-nay-ah-sa-na)
Description: The Sanskrit word Anjaneya means salutation or praise from the root and which means to honor, to celebrate, to anoint.
Performing Instructions
- Sit comfortably in the vajra-asana (thunderbolt pose).
- Kneel up on your knees until your back, buttocks, and thighs are aligned.
- Extend your left foot forward bending your left knee at about a 90-degree angle.
- Place the palms of your hands together at the heart in the Anjali-mudra.
- Raise your arms straight up keeping the palms together while bending the head backward and looking up.
- Slowly bend backward stretching the arms backward and straightening out the right leg. Hold this position for as long as comfortable while breathing gently through the nostrils.
- Come back to the vajra-asana (thunderbolt pose) then reverse the posture by alternating legs.
Comments:
The Anjaneya-asana combines several postures and mudras (gestures) in a fluid, evolving flow that combines motion, stretching, and holds. It delivers great benefits for the back, arms, chest, legs, and hips. Regular practice will strengthen concentration and improve balance.
Perform this posture with a sense of reverence and praise. Take a moment to reside in silence and peace as your hands are held at the heart in the gesture (mudra) of salutation (Anjali-mudra). Keep the intention of praise in mind as you extend your arms skyward. Feel your entire body-mind-heart extending outward in recognition of the sacredness of life.
Duration/Repetitions:
Repeat twice on each side.
by Neetu | Jun 16, 2020 | Fitness Activity
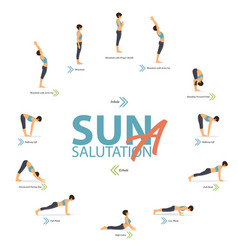
Posture: Surya-namaskar – Sun Salutation
(Pronunciation: soor-yee-ah-nahma-skar)
Description:
The Sanskrit word Surya means sun. Namaskar is the Hindi word for Namaste, from the root nam, to bow. Namaskar means salutation, salute, greeting, or praise.
STEP ONE:
Stand facing the direction of the sun with both feet touching. Bring the hands together, palm to- palm, at the heart.
STEP TWO:
Stand facing the direction of the sun with both feet touching. Bring the hands together, palm-to-palm, at the heart. Inhale and raise the arms upward. Slowly bend backward, stretching arms above the head.
STEP THREE:
Exhale slowly bending forward, touching the earth with respect until the hands are in line with the feet, head touching knees.
STEP FOUR:
Inhale and move the right leg back away from the body in a wide backward step. Keep the hands and feet firmly on the ground, with the left foot between the hands. Raise the head.
STEP FIVE:
While exhaling, bring the left foot together with the right. Keep arms straight, raise the hips, and align the head with the arms, forming an upward arch.
STEP SIX:
Exhale and lower the body to the floor until the feet, knees, hands, chest, and forehead are touching the ground.
STEP SEVEN:
Inhale and slowly raise the head and bend backward as much as possible, bending the spine to the maximum (as in the naga-asana).
STEP EIGHT:
While exhaling, bring the left foot together with the right. Keep arms straight, raise the hips, and align the head with the arms, forming an upward arch.
STEP NINE:
Inhale and move the right leg back away from the body in a wide backward step. Keep the hands and feet firmly on the ground, with the left foot between the hands. Raise the head.
STEP TEN:
Exhale slowly bending forward, touching the earth with respect until the hands are in line with the feet, head touching knees.
STEP ELEVEN:
Inhale and raise the arms upward. Slowly bend backward, stretching arms above the head.
STEP TWELVE:
Stand facing the direction of the sun with both feet touching. Bring the hands together, palm-to-palm, at the heart.
by Santosh | Jun 16, 2020 | Fitness Activity
LEARNING OUTCOME
Develops defending skills and can be easily modified to develop the object control skills of catching, throwing, kicking and striking.
TEACHING CUES
- Try to match the abilities in each square.
- Make sure all players are included
- No physical contact.
ACTIVITY SET-UP AND PROCEDURE
EQUIPMENT:
- The indoor or outdoor playing area
- Variety of balls of different size, weight and density
- 10 marker cones
- Coloured bibs
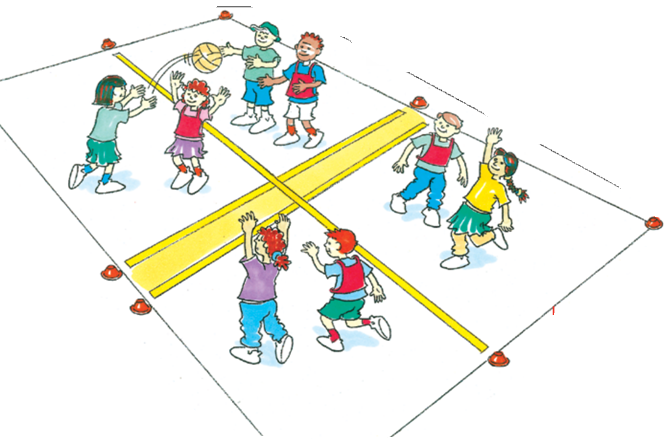
SET-UP:
- 8 players are divided into 2 teams.
- A playing area is divided into 4 and a player from each team goes into a square.
- The team in possession of the ball passes it to team‑mates in any of the 4 squares, trying to avoid interception.
- Players remain in their square.
ACTIVITY PROCEDURES:
- One team takes possession of the ball (receivers) and tries to make as many passes as possible between themselves. The other team (interceptors) tries to intercept the ball.
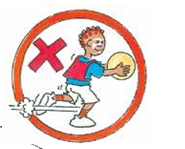
- Players can pass in any direction – no running with the ball.
- All players must remain in their own square.
- If the interceptors catch the ball or knock it out of play, they take possession.
- Winners are those who score the highest number of consecutive passes.
COOL DOWN/ CLOSURE
Review Skill/Activity, stretching, and questions.
by Neetu | Jun 15, 2020 | Sports
Aim
Holding the Hockey Stick with comfort and confidence.
Equipment Required
1 Hockey Stick, 1 ball, 1 saucer cone per student
Play Area Set-Up
- Create boundaries for a large activity area with large cones.
- Scatter saucer cones throughout the area to create a home base for each student.
Activity Description
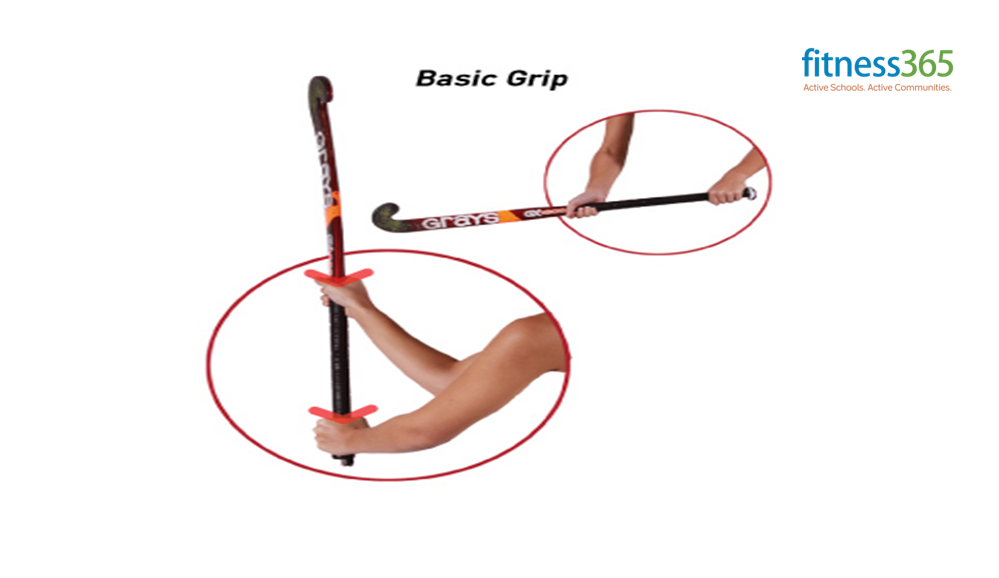
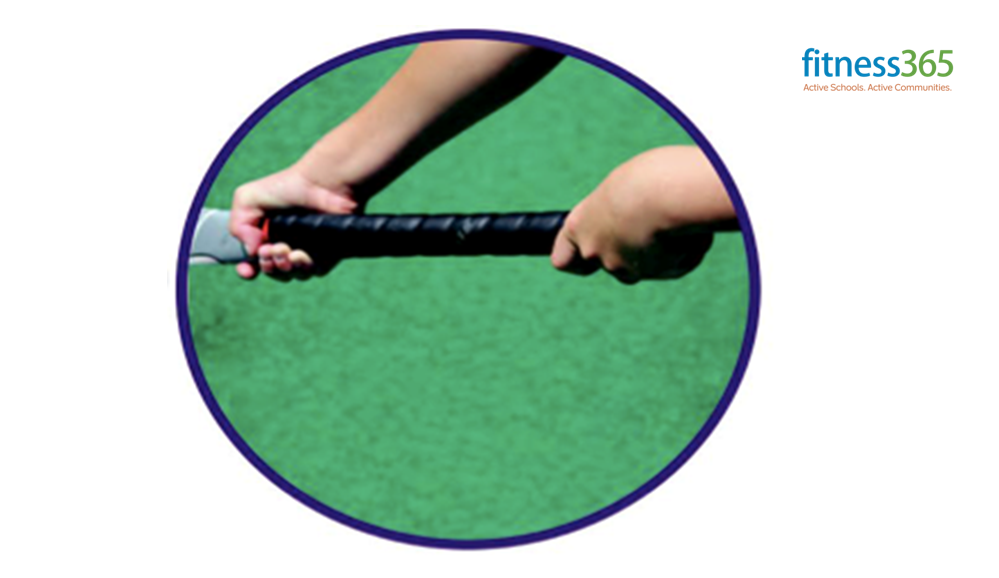
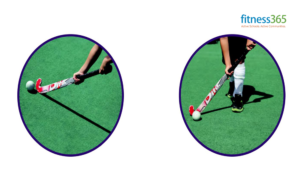
Hockey Grip
- The firm left-hand grip at the top of the stick
- Turn Stick like opening a door
- Right hand well down the stick
- Forefinger and thumb form a “V”
- Relaxed right-hand acts as a guide
- Used to dribble, trap the ball, and push passing
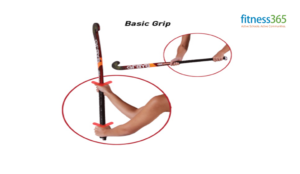
Step by Step Activity Description
- Demonstrate how the hockey stick has two sides – “Round side” & “Flat side”
- Place stick on the ground – top of the handle in line with your left foot – round side facing up
- Raise your left hand and show your left thumb and index finger pointing to the sky – we call this a “V”
- Position this grip near the top of the handle with the thumb pointing towards the ground and index finger towards the front – wrap thumb and fingers around the stick with your little finger near the top of the handle
- Bend at the knees and lift the hockey stick with the left hand – hold the stick in front of you
- Demonstrate how to use the left hand to turn the stick – Hook points towards the sky – Hook points to the ground – Turn the hook and move the ball from side to side – turn your left wrists thus allowing the flat side of the hook to roll over the ball
- The positioning of the right hand – place right hand under the stick at the end of the handle grip – holding the stick loosely
- Demonstrate holding the stick in the air – turn the toe of the stick towards the sky and ground with right hand on the stick
- The stick will be able to slip through move up and down in the loose right hand like a tunnel
- This demonstration shows how the left wrist turns the stick with the right hand having a soft grip
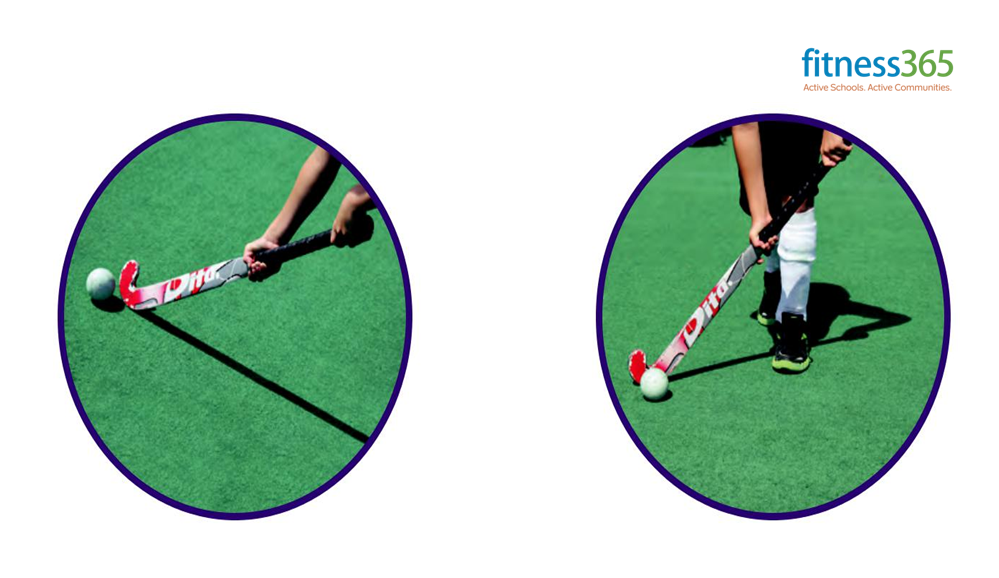
Athletic Stance
- Wide Base – Feet shoulder-width apart
- Knees slightly bent, slight squat
- Elbows comfortably away from your body
- Head on a ‘swivel’, not looking down!
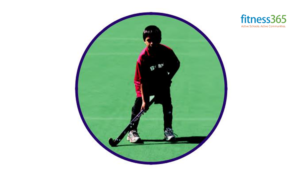
Step by Step Activity Description
- The stance – bend at the knees (not the back) with left foot forward and stick on the ground
- If players rotate their right wrist towards their left side, then that player is holding the stick too tight with the right hand
- Players stand with left foot forward knees bent – coach walks around and looks at each player’s grip and stance
by Santosh | Jun 15, 2020 | Fitness Activity
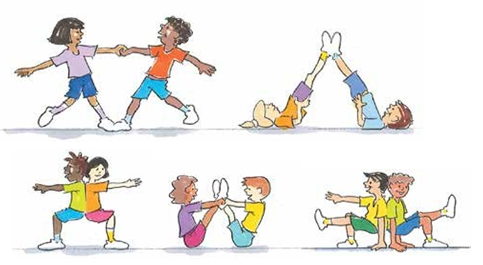
LEARNING OUTCOME
Introduces making and holding shapes in groups, which is needed for many balancing activities
TEACHING CUES
- Make sure players are performing their balance on their mat or soft grass.
- Do not allow players to use their head as a balance option.
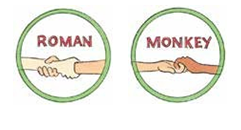
- Ensure players securely ‘brace’ one another with appropriate hand grips (e.g. the monkey grip or Roman grip). These must be firm and strong.
ACTIVITY SET-UP AND PROCEDURE
EQUIPMENT:
1 scatter mat per pair or a soft grassed area
SET-UP:
- Match participants appropriately.
- Make sure players are controlling their exits from the balance.
ACTIVITY PROCEDURES:
- On ‘GO!’, pairs move freely
around the room holding hands until they hear your signal.
- Call out combinations including any of the following: feet, bottom, shoulders, knees, hands, backs, elbows.
- Players find a mat and assume the position called (e.g. if you call out ‘THREE HANDS, TWO FEET!’, pairs form a balance with only these number of body parts touching the ground).
- Players hold their position for a set time (e.g. 10 seconds).
- Players must always be in contact with one another to maintain balance.
Variations:
- Balance with a partner who is of a different size.
- Introduce equipment (such as hoops, balls, and bean bags) that must also be used in the balance.
COOL DOWN/ CLOSURE
Review Skill/Activity, stretching, and questions.